Premise
Hi everyone, this is the most interesting part from the five posts of making her. I am going to make her party dress and accessories in this and the next post. This post will be the fourth of five posts. See the Related Articles or playlist to find out other related posts and videos. Please feel free to follow the design or do your own or use any material which you already have to handcraft on it.
YOU WILL NEED
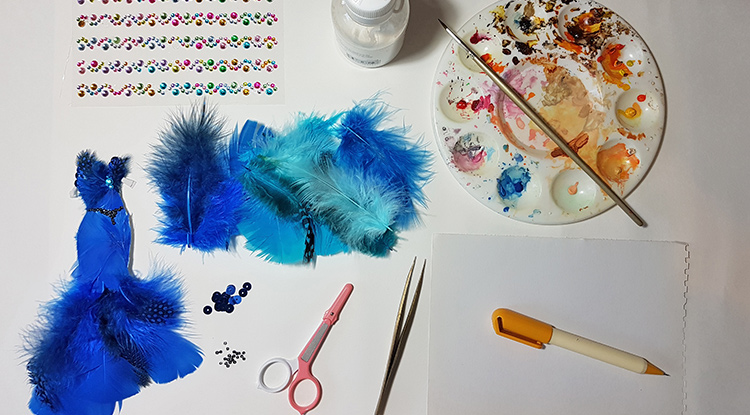
- Tweezers
- Small scissors
- A piece paper for watercolour (weighs between 90 and 140 lbs)
- A pencil
- The watercolour is the same as the feather that you have, a watercolour palette and brush
- Some blue feathers
- Some blue gems, beads and sequins
- Handcraft PVA glue
- Any old small brushes that you have.
Practice
1. Draw and paint a paper patch
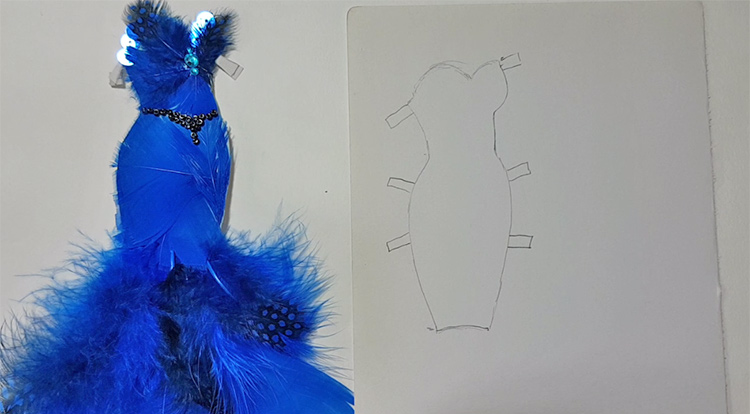
1-1 Draw a paper patch to match her figure
Take your paper doll to draw her figure on a piece of paper. At the same time, design the outline of her party dress according to your design idea. Also, draw some rectangular strips on both sides for being attached to her.
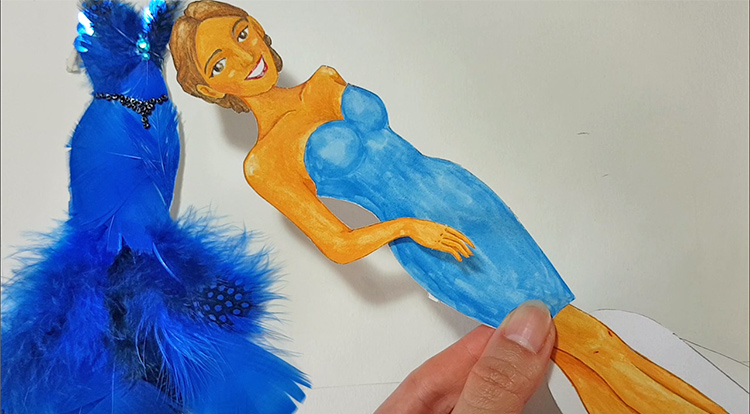
1-2 Paint the right watercolour on the paper patch and cut out it
Blend the watercolour to a similar colour as the feathers. After that, paint the colour on the paper patch. You don’t have to be too detailed, just paint on the colour. After that, trim the patch out from the paper.
Once the patch is done, get the paper doll and put it on her. Check the patch has covered her well and matches your design.
2. Handcraft the skirt hem and skirt
2-1 Come up with a dress design
From all your material choose the right length and colour of the feathers. Let it cover to her feet until her ankles. According to my design, I will like to make a curve at the edge of her skirt hem. Also, present the feathers longest to shortest from left to right. After that, design the skirt hem with a streak of a dark feather. Check the curve is looking nice at the end of the skirt hem while you are choosing this feather.
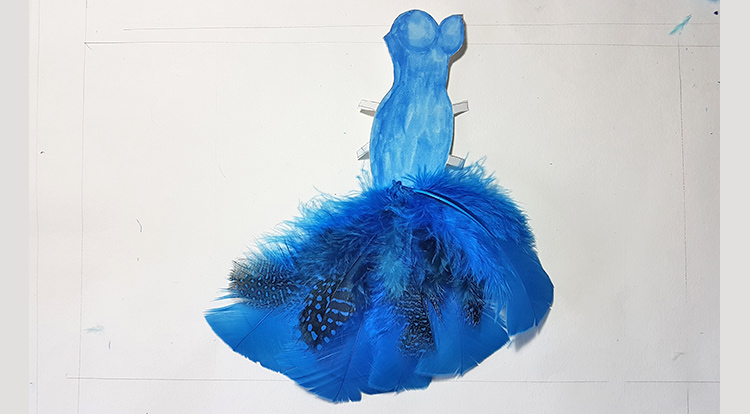
2-2 Start to glue skirt hem
Put the glue on the end of each vane, then place it at the end of the paper patch skirt. In the same way, continue processing the other four feathers on the skirt end. While you are placing the feathers on the patch, make the curve at the end of the skirt hem look smooth. In the end, I am using two pegs to stabilize the vanes and paper patch together well. 0202
When the first layer of the feathers has dried out, remove the pegs. After that, I am going to glue a dark blue feather into between two feathers from the first layer. Keep adding another three into it. Once you have done all, take some time to wait for it dry out again.
2-3 Process three patches skirt area
The names of the parts of the feather will be called as below.
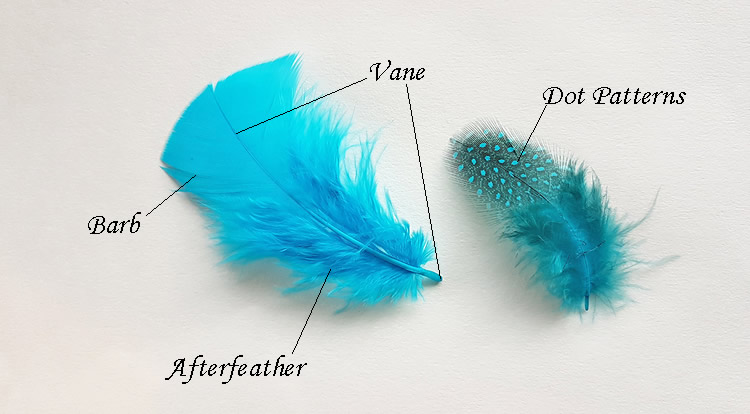
As the photo is showing you, there are three patch positions and sizes on her skirt top that will be processed in this step. I am going to use the different barb size of the feature to match these to the top of her skirt part.
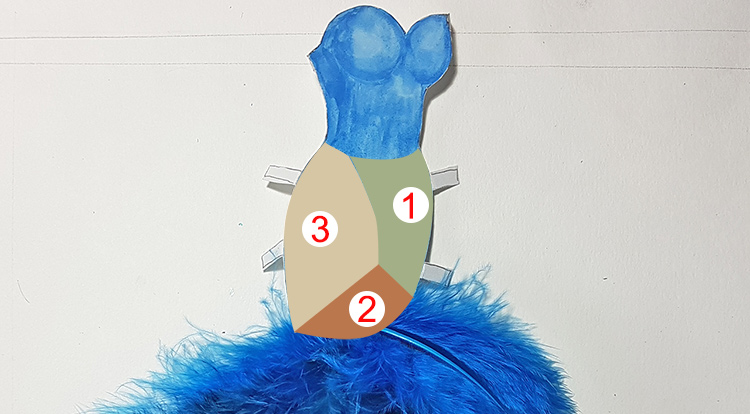
Patch 1, get a right barb shape to match her front skirt and cut the afterfeather out and glue it on the paper patch. Try to keep the shape of the feather as good as you can.
Patch 2, find a right barb shape to be able to cover the vane of the bottom feathers which you have done from the step before. Cut the afterfeather out and glue it on the paper patch. Trying to hide the top point of the vane under the patch 1.
Patch 3, get a right barb shape to be able to cover her bottom area. Cut the afterfeather out and glue it on the paper patch. Also, trying to hide the top point of vane under the patch 1 and overlay well on top of patch 2.
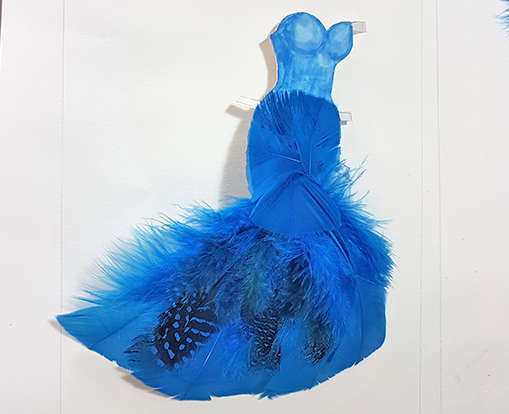
Once the three patches have been done, follow the paper patch to trim the excess off.
3. Handcraft the top and decorations
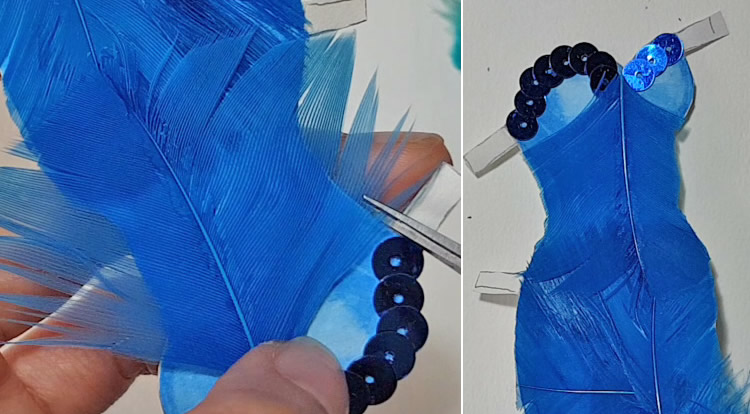
3-1 Decorate the top edge with some blue sequins
I am going to decorate the upper edge with some blue circle sequins. Put some glue and place the sequins on it. I am keeping about the radius of the sequins as the spacing. Let the two arcs converge to the centreline of the figure in perspective.
After that, choose a big barb which is able to cover all her top. Let the barb of the centre vane able to align to her centreline too. Then, glue the barb on the paper patch. Press the barb well on the paper patch when the glue is put on the vane.
After that, trim the excess off from both sides and match the figure of the paper patch.
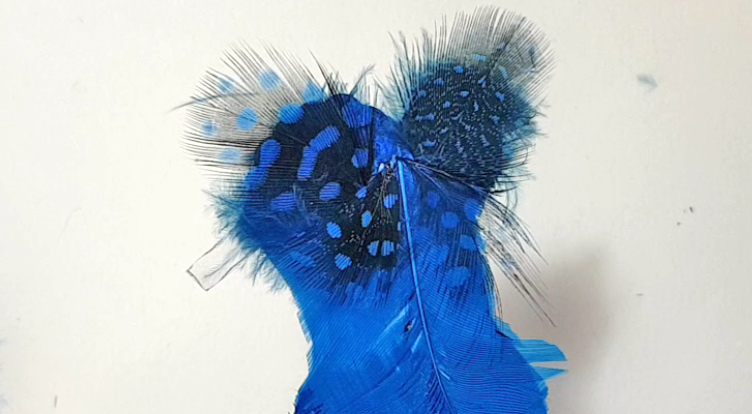
3-2 Design a butterfly in front of her chest
I am trying to make her chest looks fluffy by using four afterfeathers and some dots of the barbs on both sides of her chest. As a result, I am cutting off the barb and trim the shape to look round. After that, insert it into the right side of the chest position on the paper patch. For the left side, process it the same.
Once the design is decided, glue four of the afterfeathers first. After that, make the two bigger dot patterns to be glued at the top front and glue the other two smaller ones under the top one. Present it as a butterfly shape on the front of her centerline.
4. Decoration her with beads and gems
Apply a row of glue on her waistline, then place some beads on it. Please feel free to design any style of her belt. I am making double rows of beads on her centre to design her belt.
After that, I am sticking two small and one big blue gems to the centre of the butterfly shape.
In the end, trim some excess to improve all shapes of her dress. Also, organize all dark blue feathers on her skirt hem and make it look good.

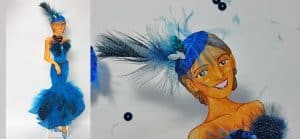
Payoff
Here we go, she has her fancy blue feather party dress. I am here to offer you some ideas to design your paper doll party dress, please feel free to use your creativity to let her dress look awesome.
Thank you so much for checking out this course and I hope that you enjoy this tutorial. I will share more interesting DIY courses with you. Please subscribe if you like this content, see you soon next time.
![Paint a smiling face and draw cheeks with watercolor [blue 2/5]](https://3howto.com/3howto-imgs/2020/05/Drawing-Painting-Handcraft-art-paint-a-lady-wearing-blue-slip-dress-with-watercolor-hero-updeat01-300x139.jpg)
![Draw a lady with smiling face [blue 1/5]](https://3howto.com/3howto-imgs/2020/05/How-to-draw-a-character-make-her-3D-party-dress-Draw-a-lady-wearing-blue-hero-update01-300x139.jpg)