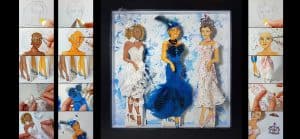
Premise
Hi everyone, I am going to use watercolors to paint the lady which I've drawn from the first post. This post will be the second of five posts. If you want to learn how to draw her, please go to the first post, then come back here to paint her. The next tutorials will create her standing board and handcraft her three dimensional party dress and accessories.
YOU WILL NEED
- A set of 12 – 16 watercolours. You will learn how to blend the correct colours
- A watercolour palette
- A number 0000 (4/0) round brush. Try to get the smallest round brush, as it’s really helpful to draw the fine line on her and her face details.
- A number 0 round brush
- A No. 4 flat brush (optional)
- Some containers for watercolour painting, whatever you have
- Some kitchen paper. It’s a good idea to dry your watercolour brushes when they are too wet.
- Some tissue paper. It’s a very good tool to draw the highlight areas.
Practice
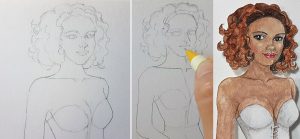
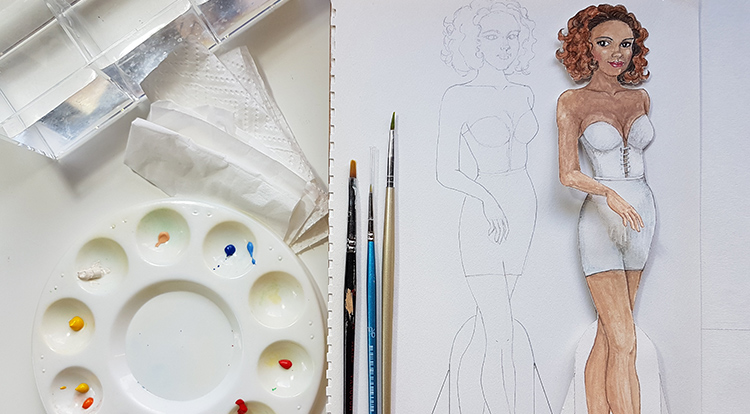
1. Paint skin parts
Step one, blend the right colour for her skin and then test it on the side paper. Repeat the process until you are happy with it.
[Skin color]: orange, lemon yellow, red, brown and white
When the brush has a rich pigment, I will start to paint the shadow areas or paint her from the edge of the body parts. After that, gradually add a little bit of water to dilute, then paint in the areas with higher brightness.
![Drawing, Painting and Handcraft art: paint a lady wearing a white slip dress with watercolour [2/5] -- paint skin parts](https://3howto.com/3howto-imgs/2020/05/Drawing-Painting-Handcraft-art-paint-a-lady-wearing-white-slip-dress-with-watercolor-01.jpg)
About the highlights, get a brush to wash away the colour from it if it had some pigments. Paint clear water on the highlighted area and use the tissue paper to pad dry that area. It’s better to shape the tissue paper into the highlighted shape that you want. Then, dab the tissue paper on it.
![Drawing, Painting and Handcraft art: paint a lady wearing a white slip dress with watercolour [2/5]- process highlights on her skin](https://3howto.com/3howto-imgs/2020/05/Drawing-Painting-Handcraft-art-paint-a-lady-wearing-white-slip-dress-with-watercolor-02.jpg)
In the end, add a little bit darker colour into the skin colour and paint on the dark skin areas.
![Drawing, Painting and Handcraft art: paint a lady wearing a white slip dress with watercolour [2/5] -- paint shadow areas](https://3howto.com/3howto-imgs/2020/05/Drawing-Painting-Handcraft-art-paint-a-lady-wearing-white-slip-dress-with-watercolor-03.jpg)
Use this method to complete all parts of her skin areas.
2. Paint slip dress and shoes
Step two. Here, I have drawn some mistakes from the step before, just use the clean water to wash it away and pad the tissue paper on it.
Blend the right colour for her slip dress and test it on the side paper. Repeat the process until you are happy with it.
When the brush has a rich pigment, I will start to paint the shadow areas or paint the edge of her dress. After that, gradually add a little bit of water to dilute the paint, then paint in the areas with higher brightness.
![Drawing, Painting and Handcraft art: paint a lady wearing a white slip dress with watercolour [2/5] -- paint her slip dress](https://3howto.com/3howto-imgs/2020/05/Drawing-Painting-Handcraft-art-paint-a-lady-wearing-white-slip-dress-with-watercolor-04.jpg)
In the end, add a little bit darker colour into her dress colour and paint on the shadow areas.
About the highlights, clean the brush and paint clear water on the highlighted area and use the tissue paper to pad that area.
From my design her top has some string pattern on the front, I am going to use dark grey to make the holes. After that, draw the white string across, then draw some dark grey just behind these white strings.
![Drawing, Painting and Handcraft art: paint a lady wearing a white slip dress with watercolour [2/5] - draw her string pattern on the front](https://3howto.com/3howto-imgs/2020/05/Drawing-Painting-Handcraft-art-paint-a-lady-wearing-white-slip-dress-with-watercolor-04-02.jpg)
Use this method to complete all parts of her dress and shoes.
![Drawing, Painting and Handcraft art: paint a lady wearing a white slip dress with watercolour [2/5] - paint her shoes](https://3howto.com/3howto-imgs/2020/05/Drawing-Painting-Handcraft-art-paint-a-lady-wearing-white-slip-dress-with-watercolor-05.jpg)
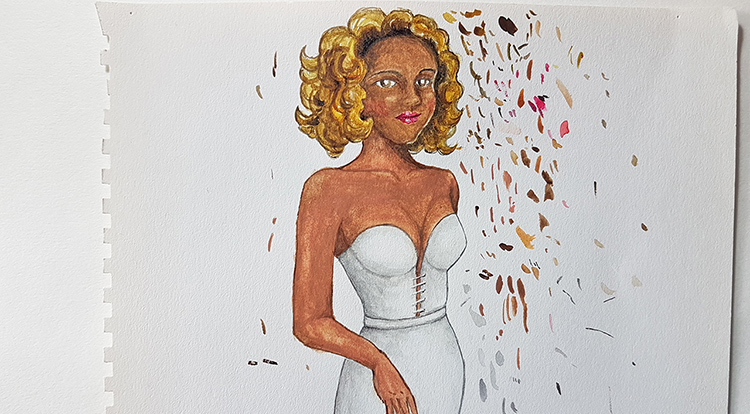
3. Paint her face details and hair
Here are some photos to show you that I tested and failed in drawing her face. Any experiments that I have done are very good chances to improve my drawing.
![Drawing, Painting and Handcraft art: paint a lady wearing a white slip dress with watercolour [2/5] -- test drawing faces](https://3howto.com/3howto-imgs/2020/05/payoff-01-faces-1.jpg)
Let’s start to paint her face. After some test drawing, I figure out that the number 0000 round brush is a very helpful tool for me to draw her face details.
All right, I am going to paint her nose and process some details on it. Also, I am going to improve a little bit the shaded areas around her nose.
Then, draw her lips and put dark red at both ends and draw a little bit highlights. After that, draw her cheek on both sides. Then, wash the brush, and paint clear water on highlights. After that, use the tissue paper to dry the areas.
Fill some skin colour around her lips and improve the shaded areas again. After that, draw her eyes, eyelashes and eyebrows. It’s a good time to improve her shadow areas on her face again.
In the end, I am going to draw her hair and let her have yellowy golden hair and streaks of some brown colour. Finally, put some black colour to her hair and eyes.
![Drawing, Painting and Handcraft art: paint a lady wearing a white slip dress with watercolour [2/5] - paint her eyes, eyelashes and eye brows](https://3howto.com/3howto-imgs/2020/05/Drawing-Painting-Handcraft-art-paint-a-lady-wearing-white-slip-dress-with-watercolor-06.jpg)
Payoff
At this moment we have almost done painting her. However, I like to make her look more three-dimensional, I am going to draw all edge lines around her. I am going to choose the same colours but a darker shade. This means of her skin, I will use her skin colour darkened, to draw her outlines. Also, her slip dress and shoes, I will use the dark colour of the dress to draw. In the end, use a darker colour shade of her hair to draw outlines as well.
I have almost done the watercolour painting. If the drawing edge lines are a too challenging thing for you, you can skip it or practice it on another piece of paper until you are happy with it, then you can come back to paint it later.
Here, I am showing you what I have done. You can get the link below to send me your artwork. I am keen to see your great drawings. Also, if you give me your permission I hope I am able to share your artwork with other people on 3howto.com, let us learn drawing from each other.
Thank you so much for checking out this course and I hope that you enjoy this tutorial. I will share more interesting DIY courses with you. Please subscribe if you like this content, see you soon next time.