Premise
You will learn an interesting idea to present a salad plate with a tomato. The process of the food art with vegetable tomato will include
1. Carving a tomato saucer base.
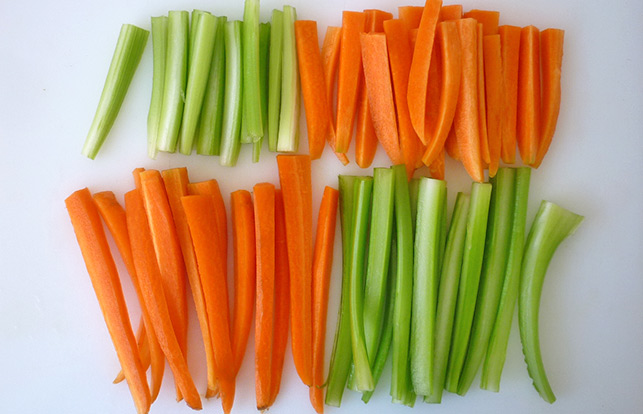
2. Cutting carrot sticks.
3. Cutting celery sticks.
4. Soaking vegetable sticks in water.
5. Inserting vegetable sticks into tomato saucer base.
YOU WILL NEED

- A chef knife
- A paring knife
- A chopping board
- A small tray (see picture-1 to find a correct size)
- A big tomato
- Some celery stalks
- Some carrots
- Some dipping sauce
Practice
1. Carving a tomato to be a saucer base
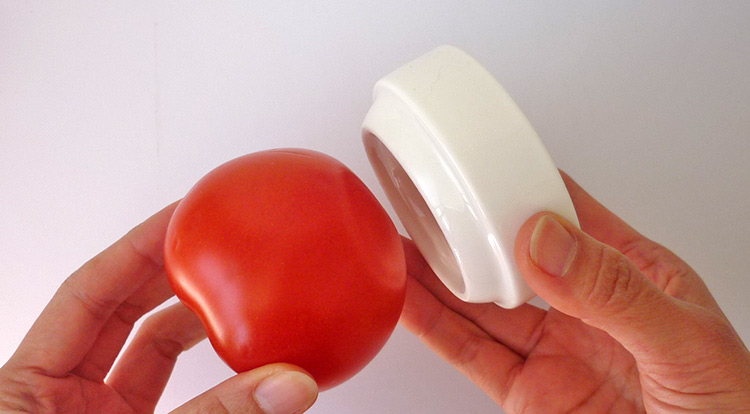
1-1 Creating a saucer base
Choose a big tomato and get a small saucer that is able to match the tomato top.
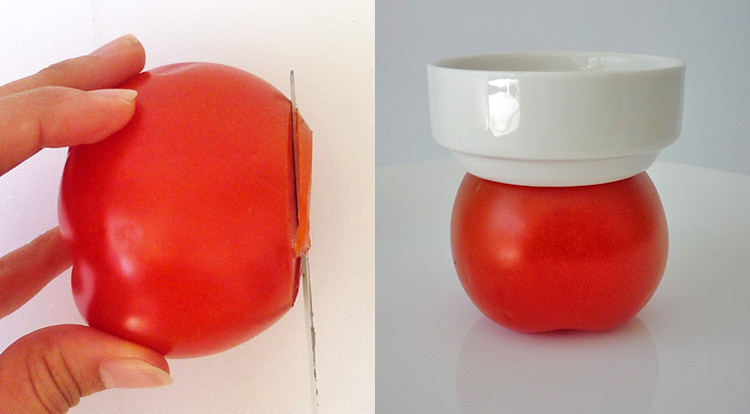
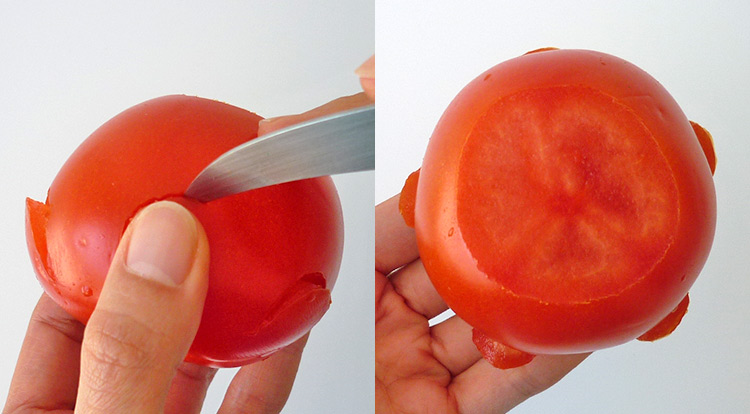
In order to let the saucer stay on top of the tomato well, we trim a little bit of the top of the tomato. After that, check whether the saucer can stand on the tomato flat.
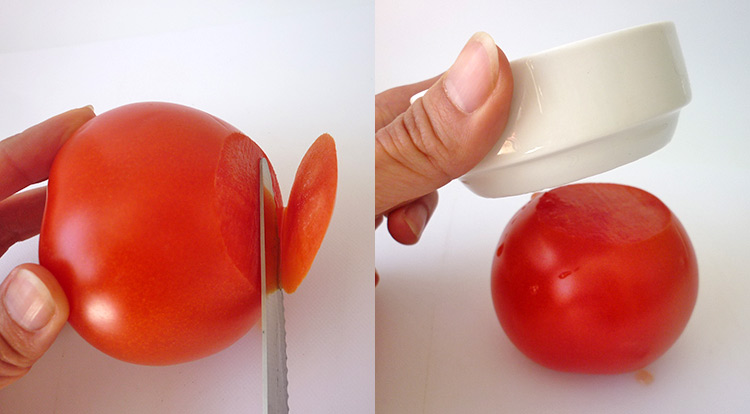
If it can’t, trim it correctly till it is parallel. After that, place them on a plate.
1-2 Carving curves on the tomato
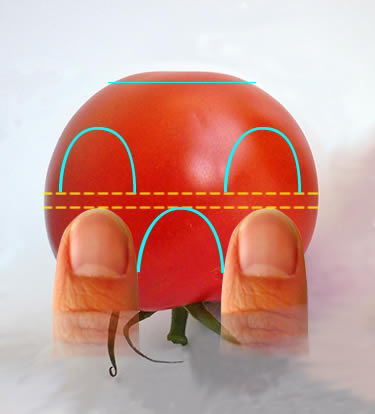
How can you carve curves on the tomato consistently? Just use your thumb as a basis of the shape. Follow the tips below to process
- Carve curves and keep one thumb width to another.
- Keep 1 cm height between the bottom level and the top level.
- Curves are a little bit narrower at the top level.
Carving curves at bottom level of the tomato base
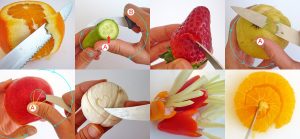
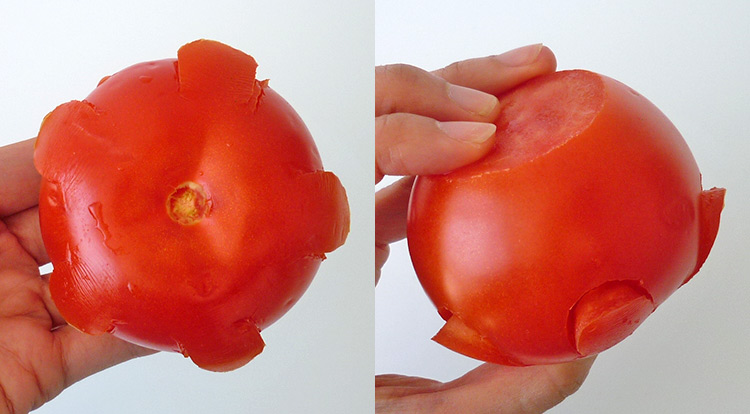
Let’s start, use the point of a paring knife to scratch an arc shallowly at first. After that, use the edge finish of a paring knife to carve more deeply.
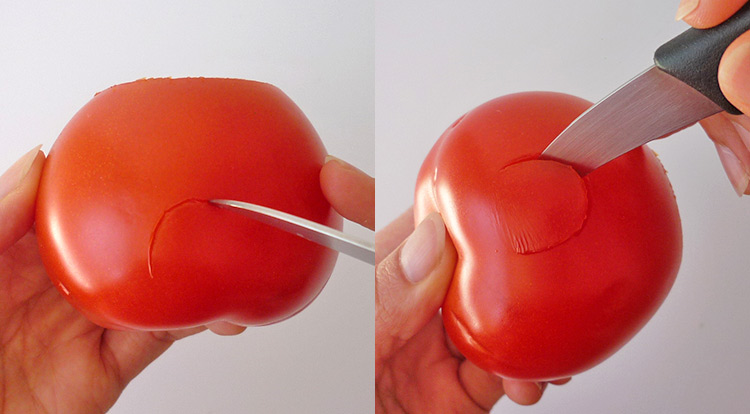
Once you made a curve on the flesh of the tomato, you can insert the paring knife and pull it out a little bit.
When you are carving the arcs if you would like to create a consistent shape. Just use your thumb to help you. Place your thumb with one thumb width between the first curve that you have done, then carve around the shape of the thumb.
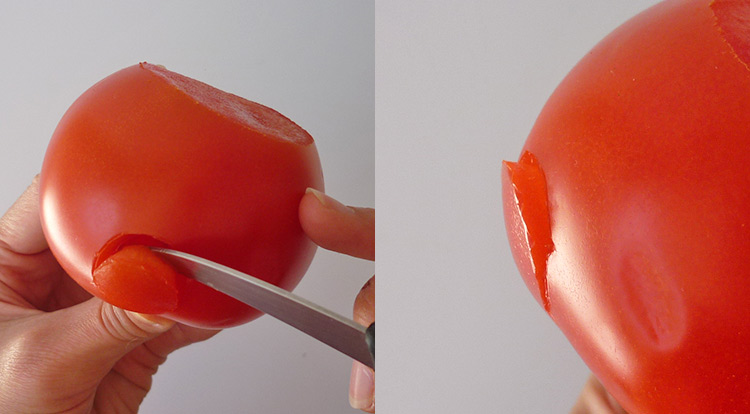
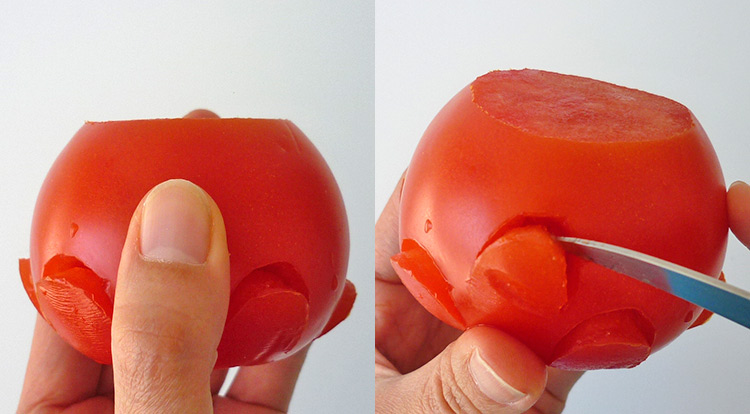
Some carving on the tomato can be deeper than others, as such, insert the paring knife deeper to get it all out.
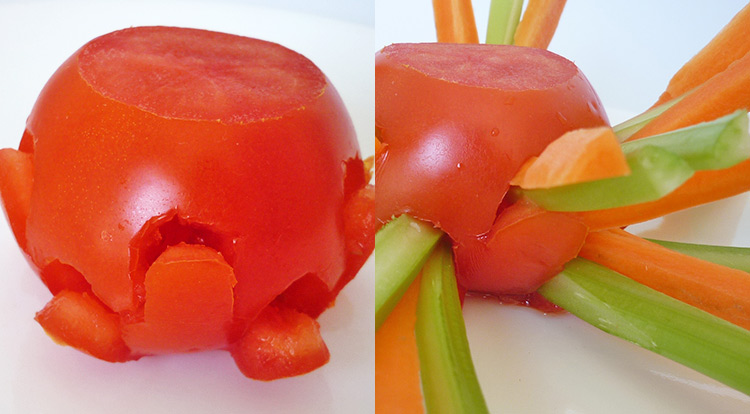
And so on to process the bottom level, you should have five curves in total.
Here is the result that you should have at the bottom level.
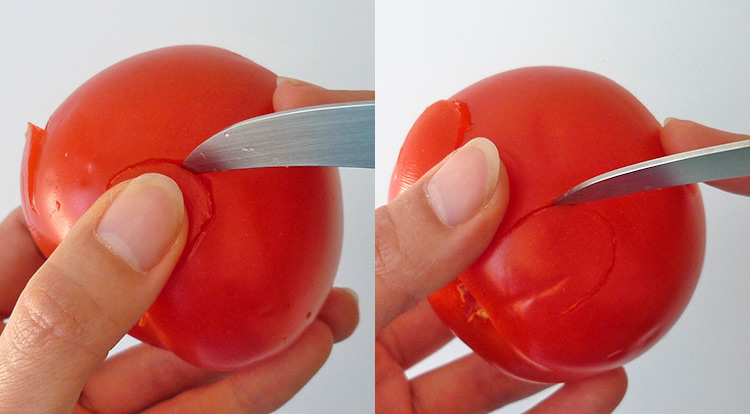
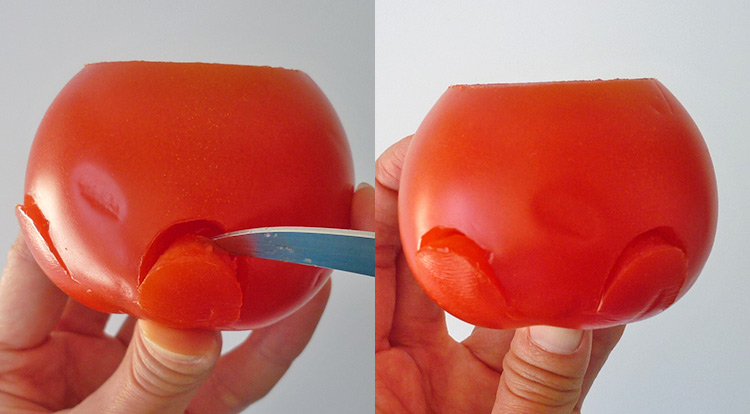
Carving curves at top level of the tomato base
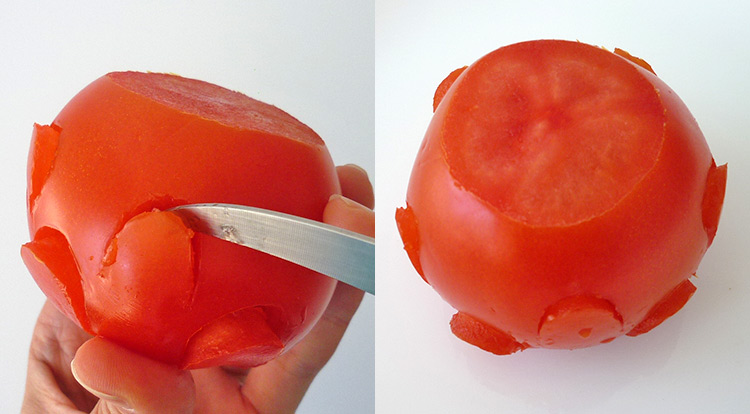
Let us start the process at the top level. Keep 1 cm distance between the bottom level to start the first curve. Also, create a curve that is a little bit narrower than the curves on the bottom one.
Keep processing until you have five curves at the top level of the tomato base.
2. Cutting carrot sticks
We are going to prepare the Jullienne cut vegetables at this step. However, the shapes are different from the normal rectangle one. In order to fit them into the curves of the tomato base, we will cut one edge narrower at the end.
Firstly, peel the carrot skin off or keep it if you want to, then remove the stem area. There are two ways to cut the carrot.
- The first way, cutting a carrot with a narrow root.
- The second way, cutting a carrot without a narrow root.
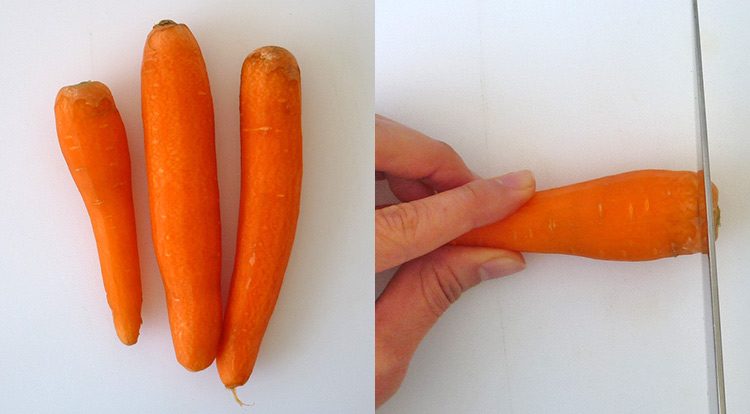
2-1 Cutting a carrot with a narrow root
If the carrot that you have is a baby carrot and the length is just right to fit on your plate. You are able to cut them with a triangle height, keep the root of the carrot narrower.
Try to get as narrow an end as you can on one end for all the stick cuts.
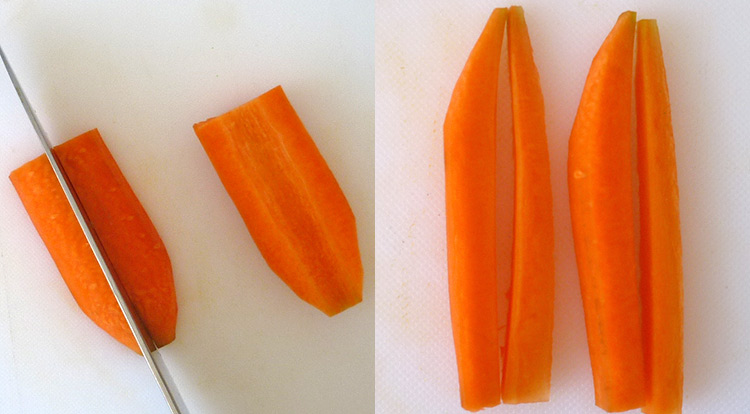
2-2 Cutting a carrot without a narrow root
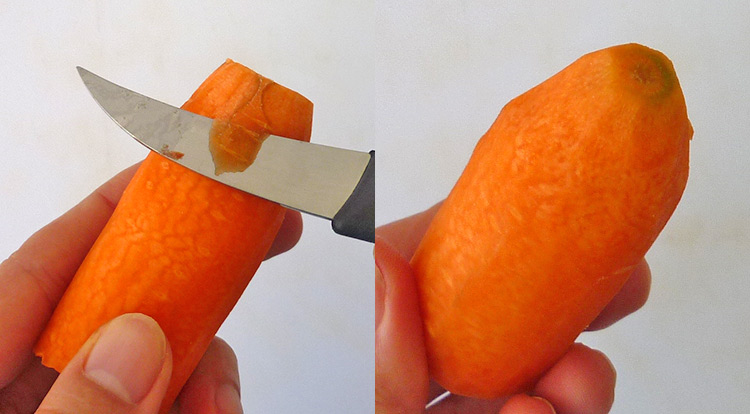
If the carrot that you are going to use has a length longer than that you want. You can cut it to a correct height first.

After that, hold a carrot and let its shoulder face outside. Use a paring knife to trim the end like a pyramid.
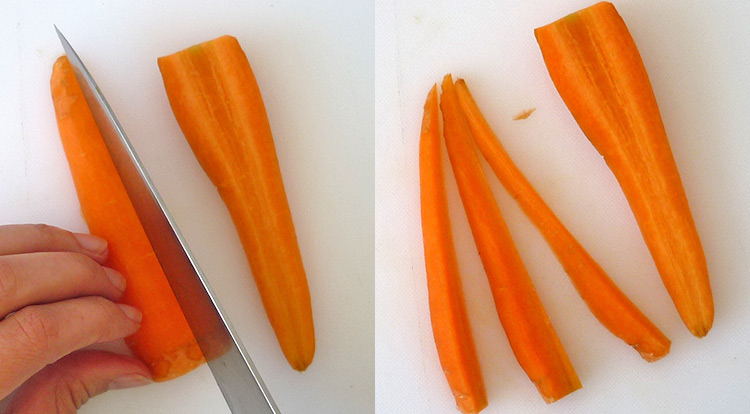
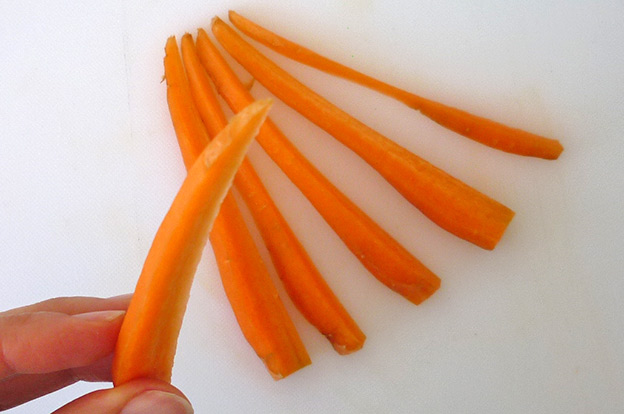
Cut it in half horizontally. After that, cut that half into a quarter. The middle section of the quarter could still be too big, as such, cut them in half again.
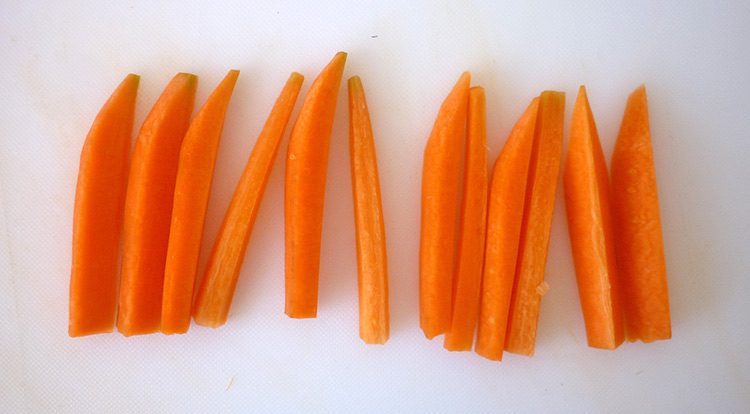
Try to make all carrot sticks with a small endpoint. See picture-19 are the result of cutting a carrot without a narrow end root.
3. Cutting celery sticks
Firstly, take three or four celery stalks, remove the top leaves and wash well. After that, trim the same length as the carrot that you have done for the celery sticks.
There are two ways to cut the celery stalks.
- Celery stalk with a narrow end.
- Celery stalk with the same width on both ends.
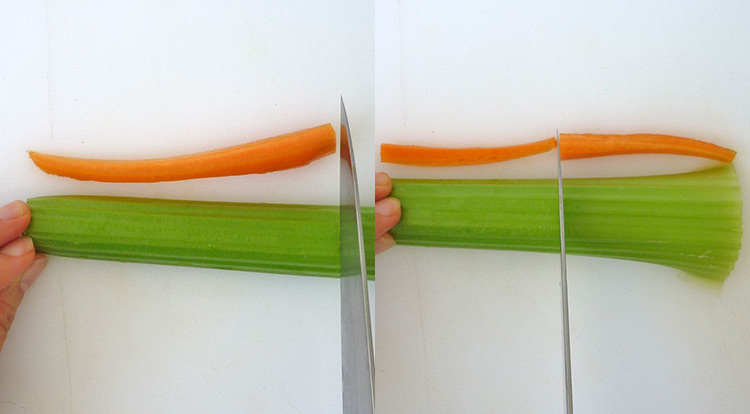
3-1 Celery stalk with a narrow end
If a section of celery that you have, has a narrow end, cut a triangle.
See picture-22 left-hand side, the red lines are where you will cut to process for this.
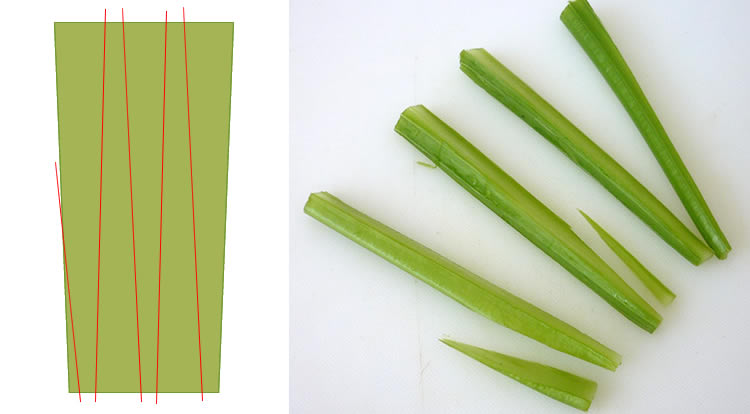
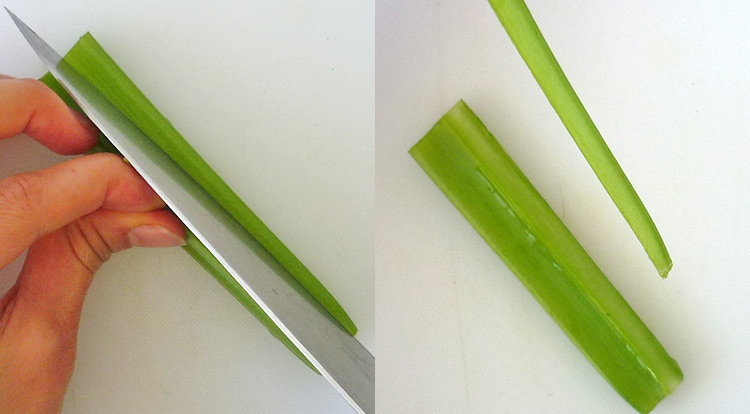
3-2 Celery stalk has the same width on both ends
If a section of stem you have has the same width on both ends. You are able to create the triangle cuts on the opposite sides alternately.
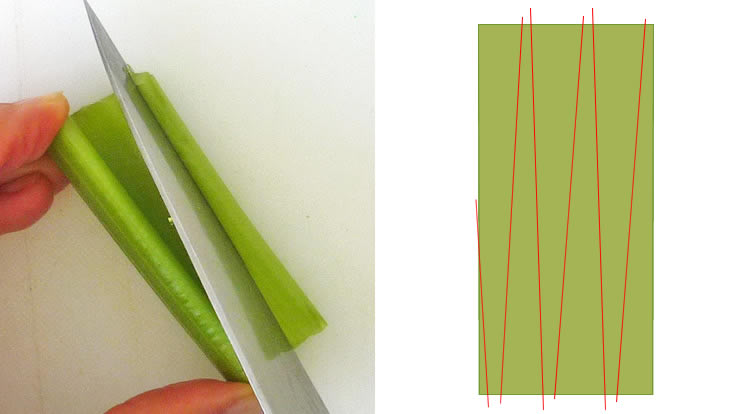
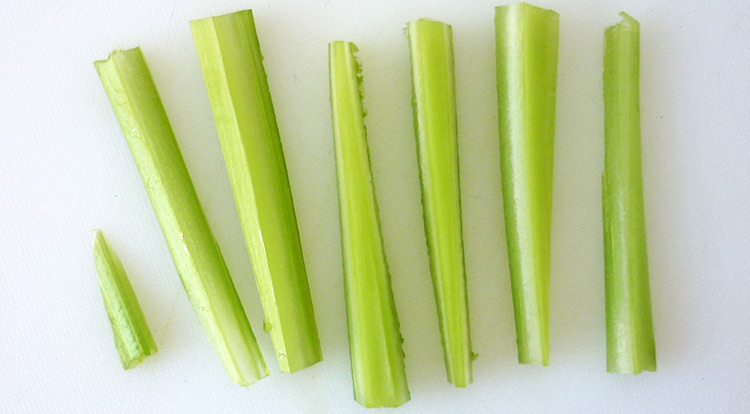
This is the result of cuts that you should have for this.
4. Soak vegetable sticks in water
When you have done the carrots and celery, please prepare a bowl with drinking water to soak them for a couple of minutes. It will help these vegetable sticks look fresh on the plate.
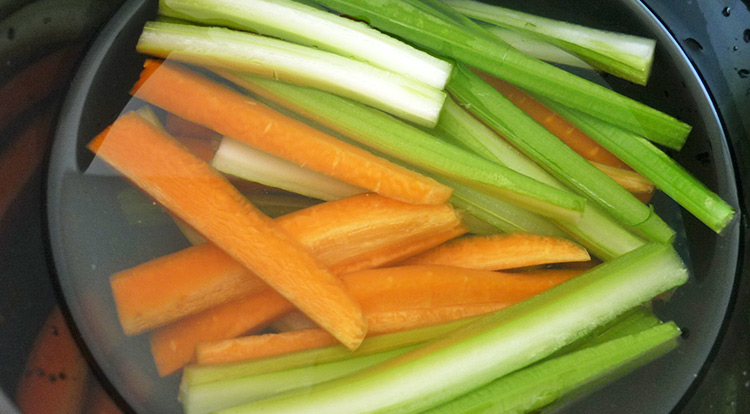
Organize the type and size on a chopping board after soaking them in the water.
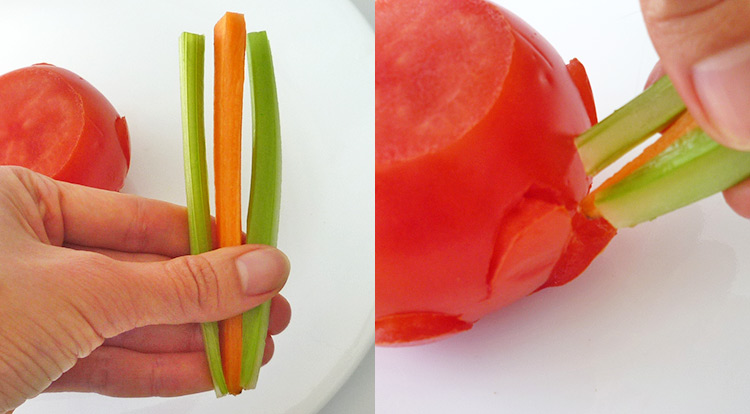
5. Inserting vegetable sticks into the tomato-saucer base
5-1 Process level one
Grab three or four vegetable sticks, and keep their narrow ends together. After that, insert the group of sticks into a curve at the bottom level of the tomato.
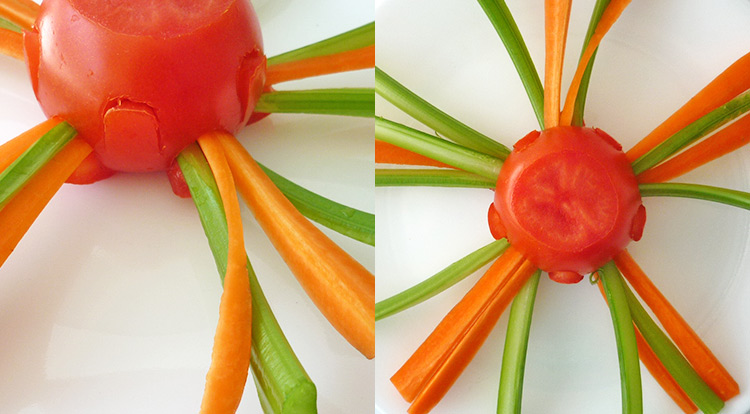
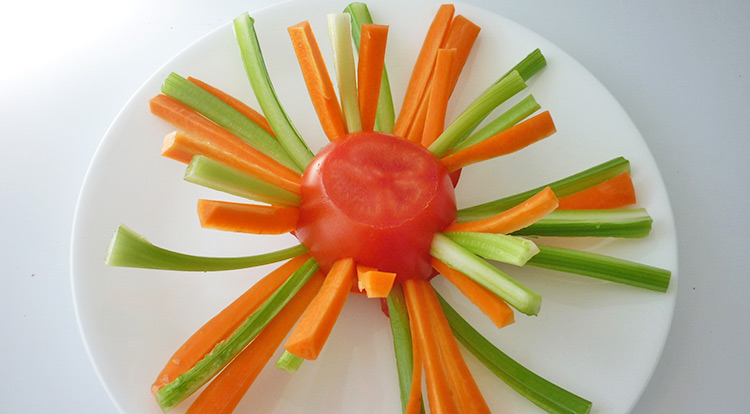
Process the other four the same way. From the top view, check these inserted vegetables, they should look like radial lines on the same circle.
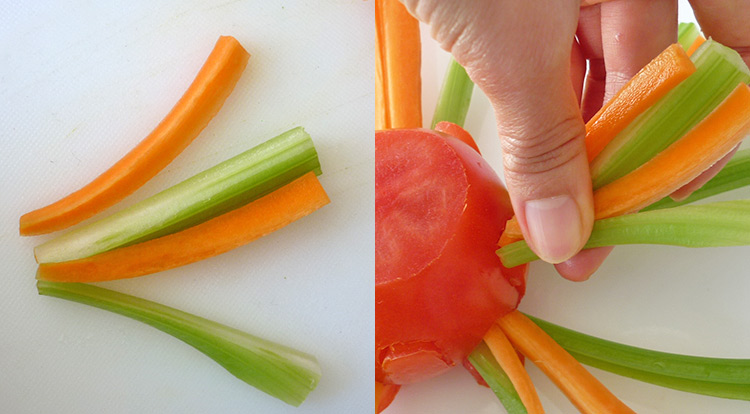
5-2 Process level two
Pick some short sticks and let their narrow ends align together, also insert it into an arc at the top level on the tomato.
Keep processing a group of vegetable sticks into the other four arcs on the top level. Check these inserted vegetables from the top and bottom levels, let them equally fill up the gaps between each group of vegetables.
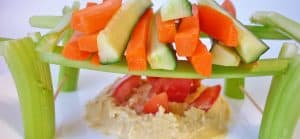
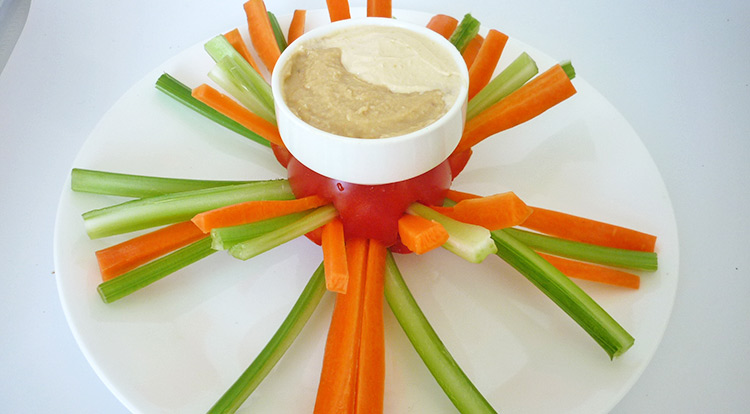
Payoff
Once the tomato base has been inserted with groups of vegetables properly, place the saucer with dipping sauce at its top. It will look amazing to serve vegetable sticks on a plate.
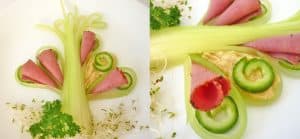
See left-hand side picture below, it has had too many vegetable sticks inserted. It is still all right to hold vegetable sticks. However, the best solution is to cut one end of the vegetable stick as narrow as you can if you would like to fit in lots of them. This is a similar idea, please see the article BBQ party vegetable.