Premise
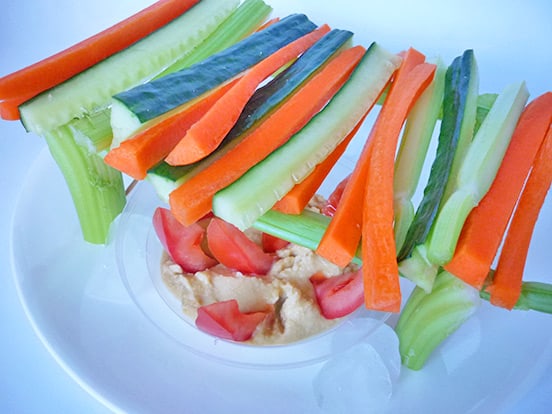
You are able to learn an idea to create an assembly celery shelves from this article. I named it the celery BBQ stand. After that, we can place the colorful Julienne cut vegetables on the celery BBQ stand with some dipping sauce under it. This is a fantastic idea for party food.
YOU WILL NEED
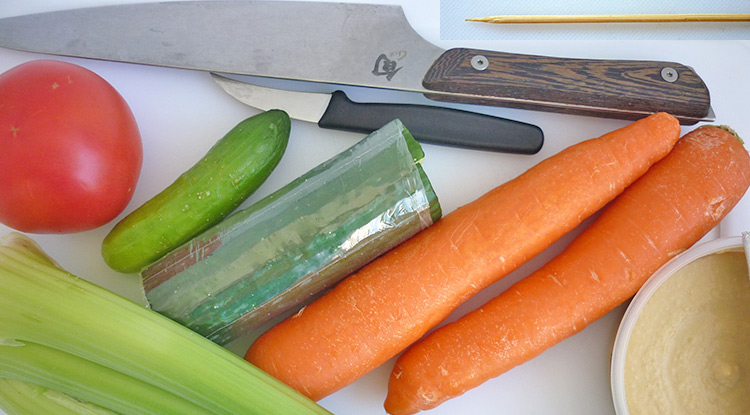
- A chef knife
- A chopping board
- A paring knife
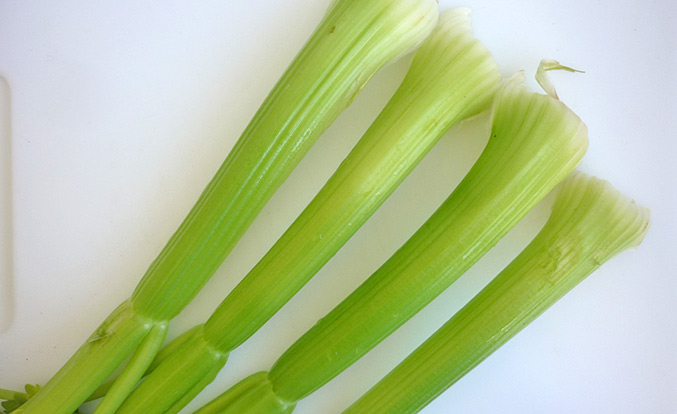
- Four celery stalks
- Two bamboo sticks
- Some cucumber
- Some Carrot
- A tomato
- Some dipping sauce
- Optional: a small sauce bowl (in picture-26)
- Optional: some ice cubes (in picture-30)
Practice
More and more people like to have healthy food for a party. This article is going to show you how to make an interesting salad platter for your party. Once you have done it, you are able to serve lots of different colourful Julienne cut vegetables on a BBQ stand which is made out of celery. There is a similar idea, please see the article Food art with tomato.
1. Making celery BBQ stand
1-1 Prepare four poles for the BBQ stand
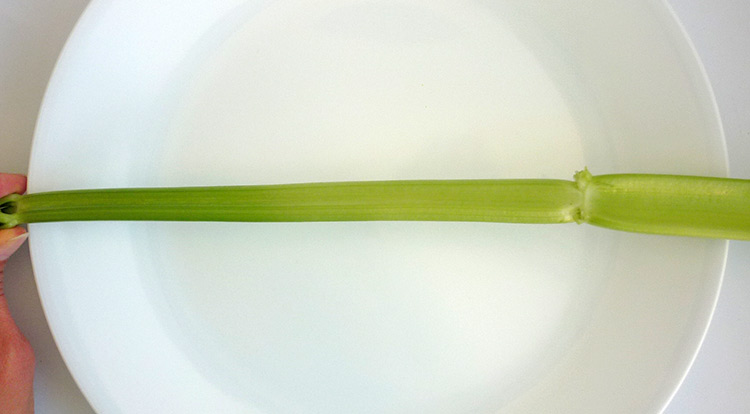
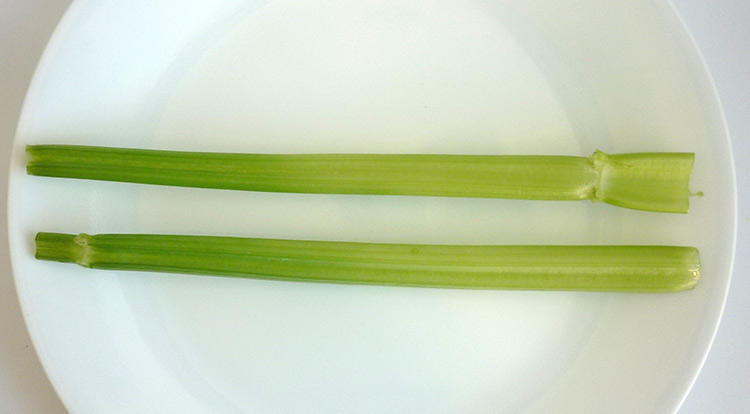
Find four celery stalks with similar lengths and shapes.
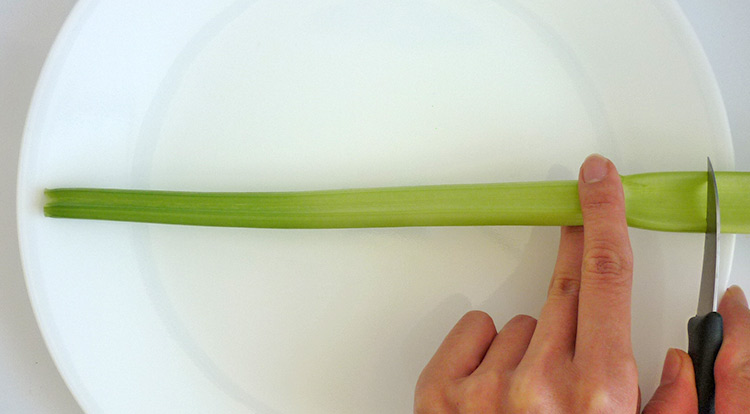
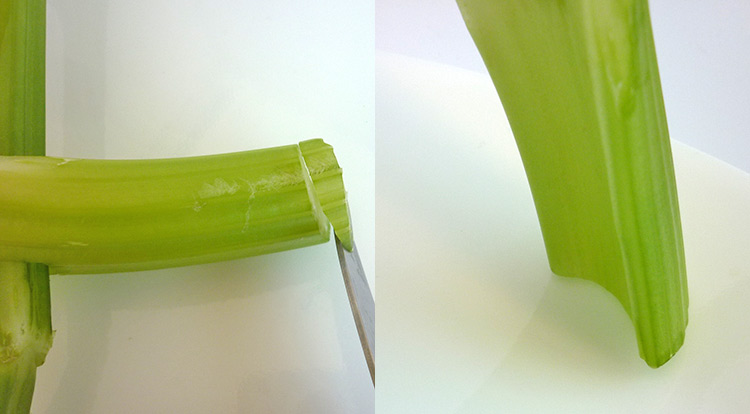
Trim one celery stalk from the bottom 12 to 15 cm long. Then trim both sides of the celery piece to have the same width.
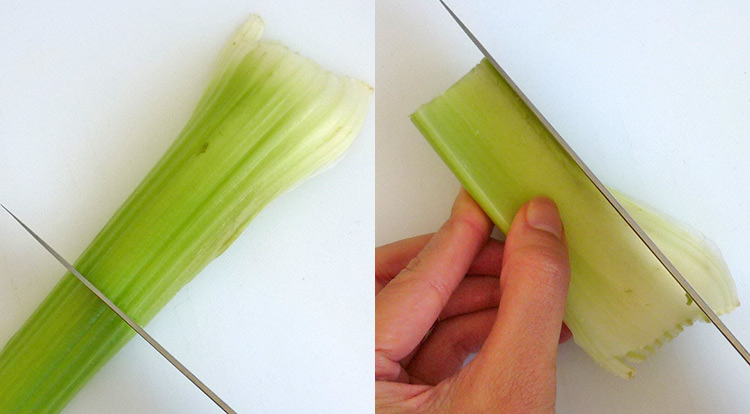
Trim the end of celery off, and keep the section pole with about 10 to 12 cm left.

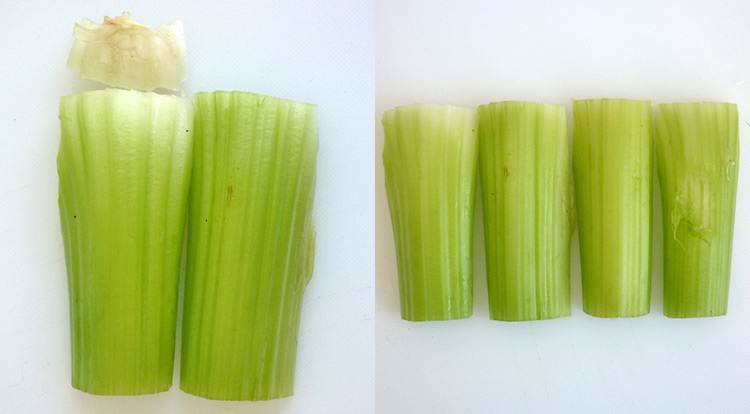
Process the same steps for the other three celery stalks.
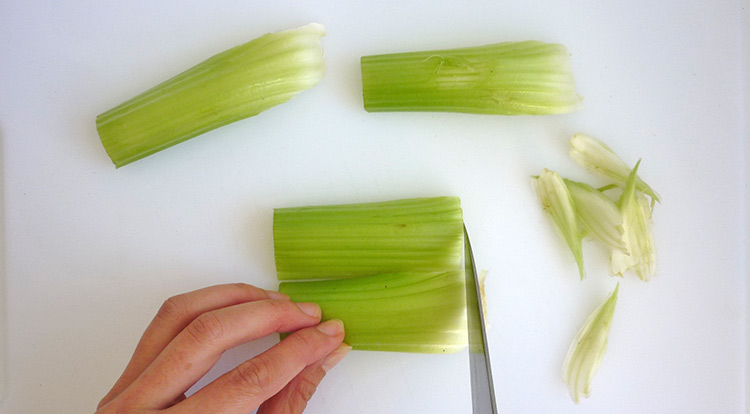
When you trim the end of celery bottom off, try to compare the other sections that you have done already. Make sure they are the same height.
1-2 Horizontal beam
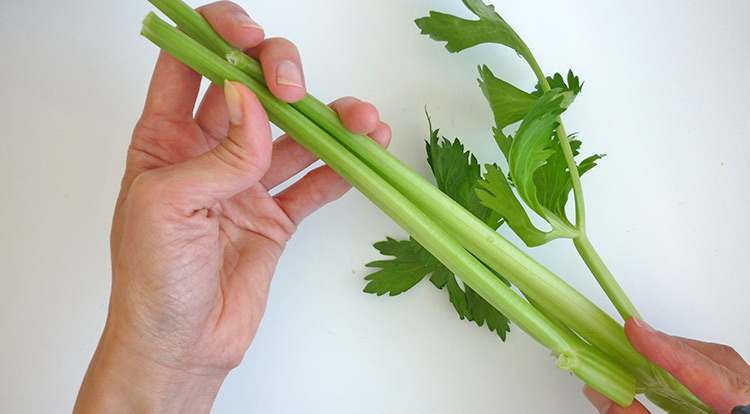
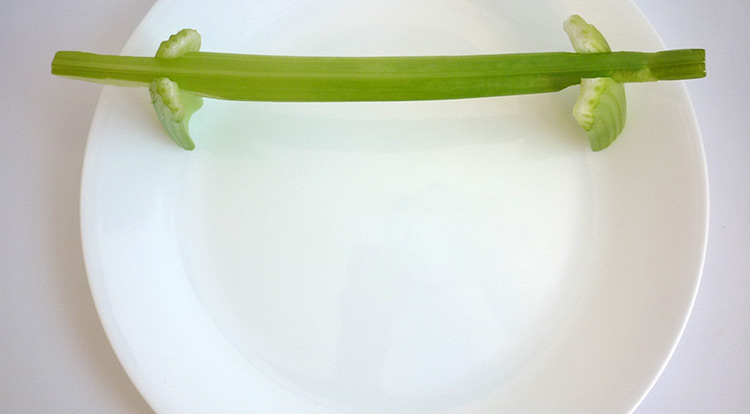
When you cut one celery stalk bottom off for making the pole of the BBQ stand, you must have the top section with leaves left. Use them here and measure with the plate that you are going to serve on.
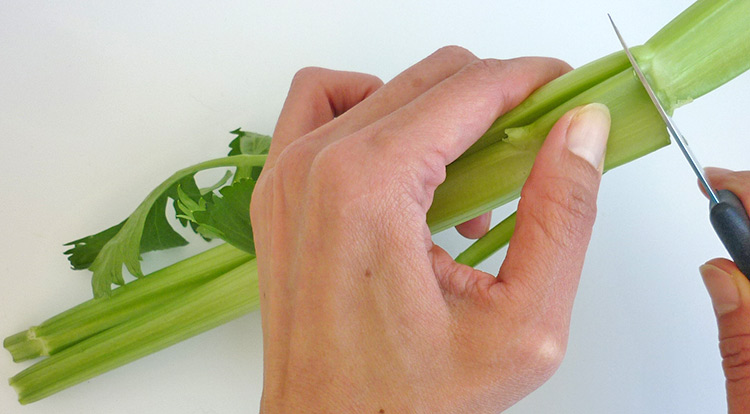
For instance, I am going to use a plate with 26 cm in width. I will need to keep the celery stalk about 22 to 24 cm long. As such, from the narrow stalk, remove the celery leaves off. Then trim it to the right length to match your plate.
Process the same steps to have another horizontal beam. It’s better to find another celery stalk with a similar thickness and shape as the first one you have done.
Cut the second one the same length as the first one.
It might be hard to find celery stalks with the same thickness and shape. That will be fine, we are going to fix it.
Trim both ends of the celery to have about 1.2 – 1.5 cm thickness.
Make the thickness of the bottom stalks are the same widths.
If the other ends have different thickness, trim them to be the same.
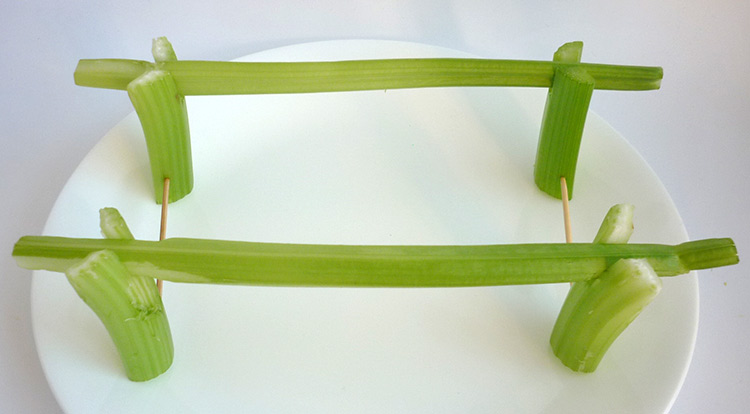
1-3 Assemble BBQ stand together
1-3-1 Create mortise and tenon to stick shelf together
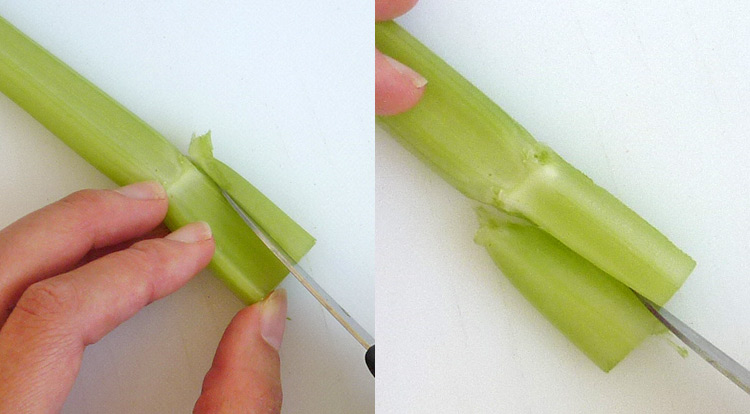
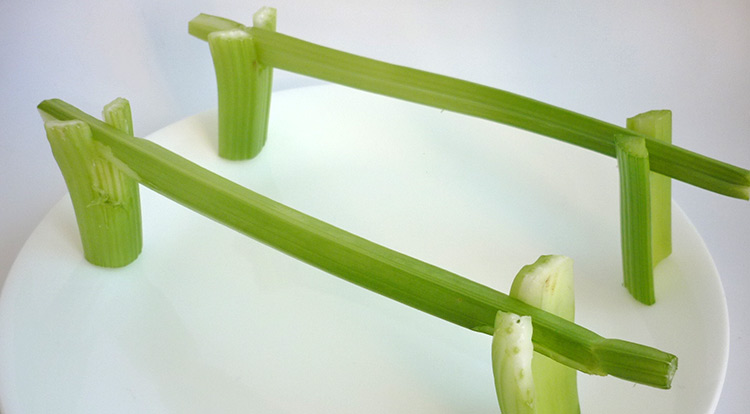
Let us connect the horizontal beam and the poles of BBQ stand together. From the step 1-1, you have created four poles of the BBQ stand. We are going to carve a mortise on the surface of the bottom section. Be aware, to use the thinner end.

Measure the width of the horizontal beam (you have done from 1-2) on the surface of the bottom section pole(you have created from 1-1) to get the idea of what the width you are going to cut. As such, cut a rectangle with 3 cm depth on the pole with a paring knife.
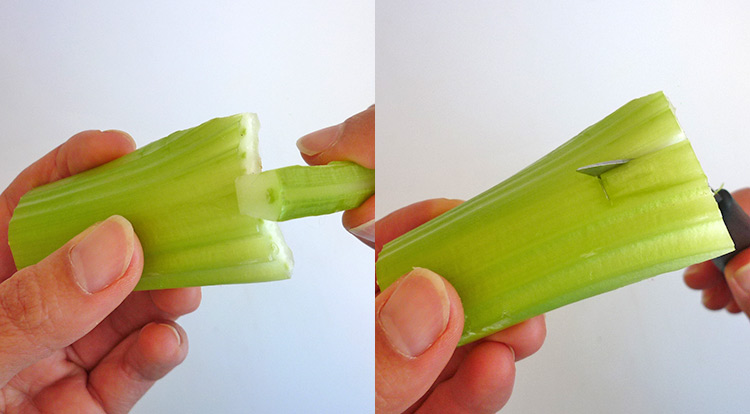
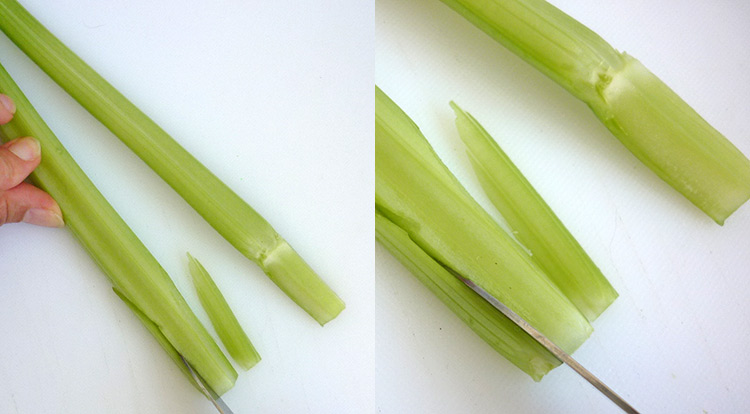
At this point, you can try to connect the horizontal beam and the pole together. If they can’t fit well, trim the width of the mortise on the pole or the width of the horizontal beam(the tenon part), let them match each other. It’s better to let the horizontal beam stick out about 3 cm length at the end.
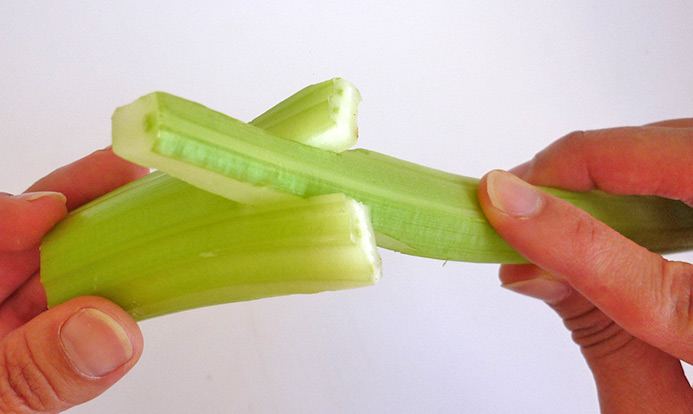
Keep trimming the horizontal beam (the tenon part) gradually on both sides.
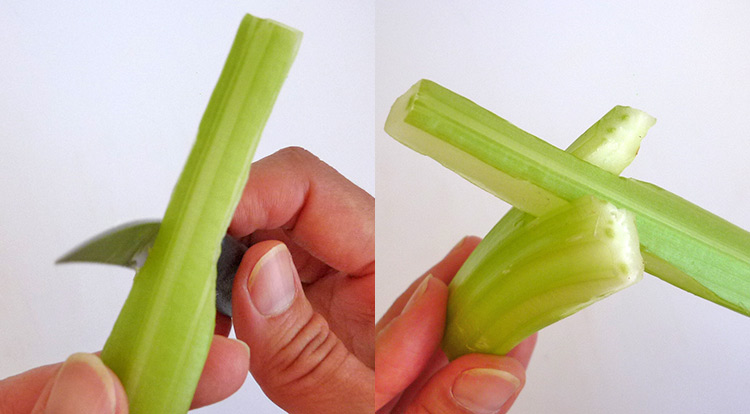
Let them be able to exactly match each other on both sides.
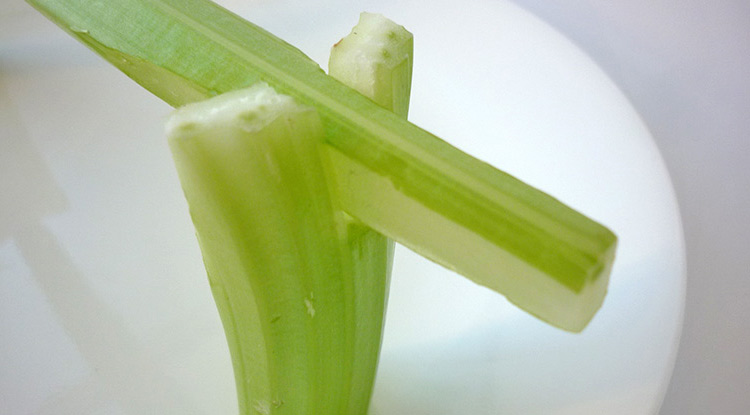
1-3-2 Place a shelf on the plate
Once you assemble the BBQ stand together for one shelf, try to set it on the edge of a plate. You will find that the curve on the edge of the plate, will not let the shelf stand up straight. Therefore, trim one side of the bottom pole to 35 degrees. But keep the other side of the pole unchanged.
If you have trimmed the correct angle on a pole, please do the same way for another one. Then you are able to let one assembly BBQ shelf stand on the plate straight.
Follow the 1-3-1 and 1-3-2 both steps to create another assembly BBQ shelf, also let it stand on the plate straight.
1-3-3 Stabilizing the BBQ shelves
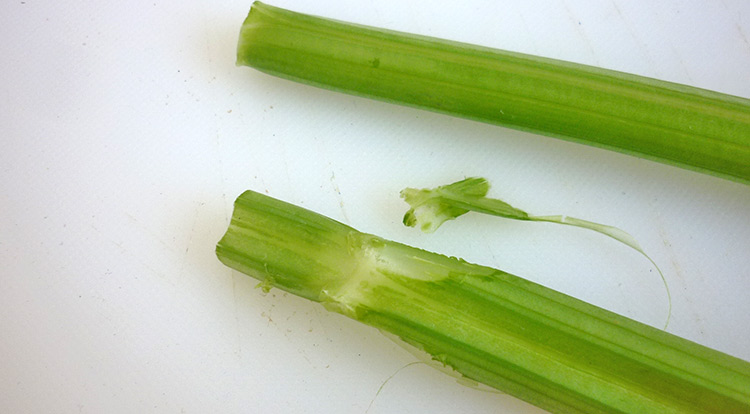
In order to stabilize the BBQ stand, we are able to use two bamboo stick to connect between both shelves. Firstly, measure the width of both sides, and cut these two bamboo sticks to the correct length. Keep the bamboo stick lengths just able to insert celery poles about 0.7 to 1 cm deep on both sides.
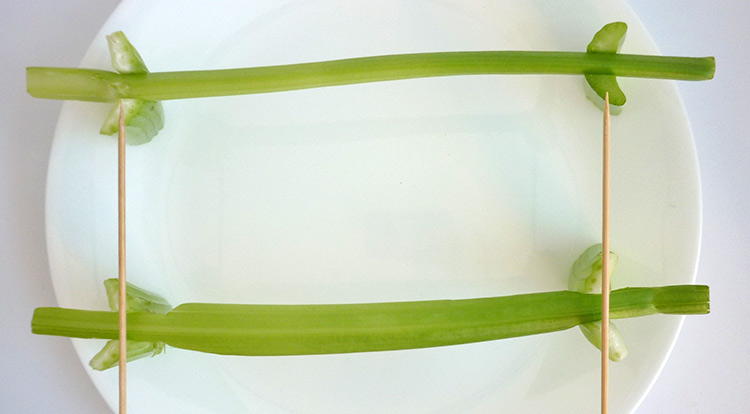
Insert one end of the bamboo stick into the inside of the end pole, do the same way to the other endpoint on the opposite side of the pole. Be aware, when you insert the bamboo stick, try to hide it well inside the celery poles. Therefore, you should not see the ends of the bamboo sticks from the front of the celery poles.
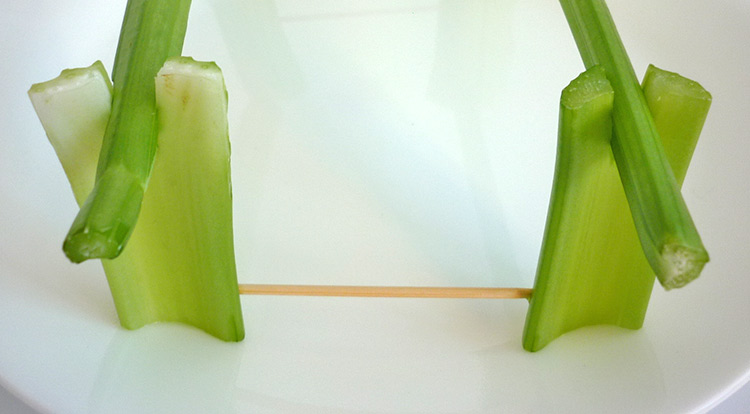
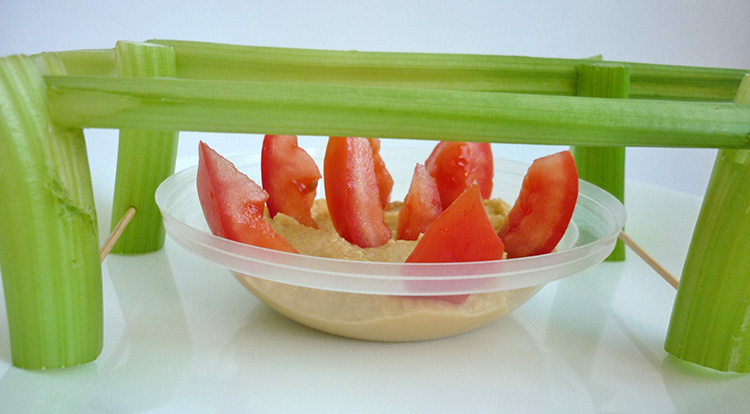
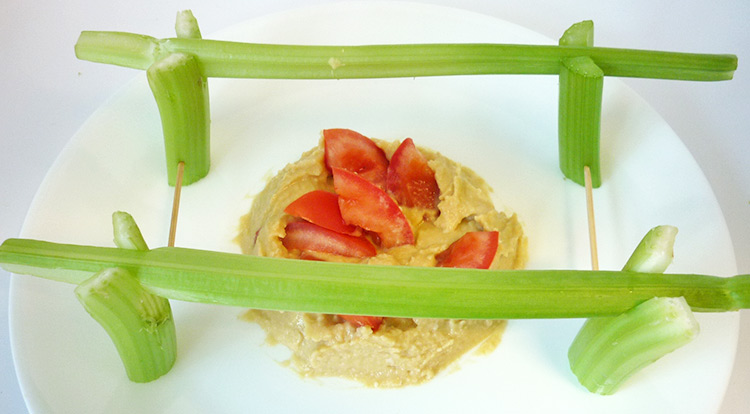
The structure of the BBQ shelves is ready to hold lots of vegetables.
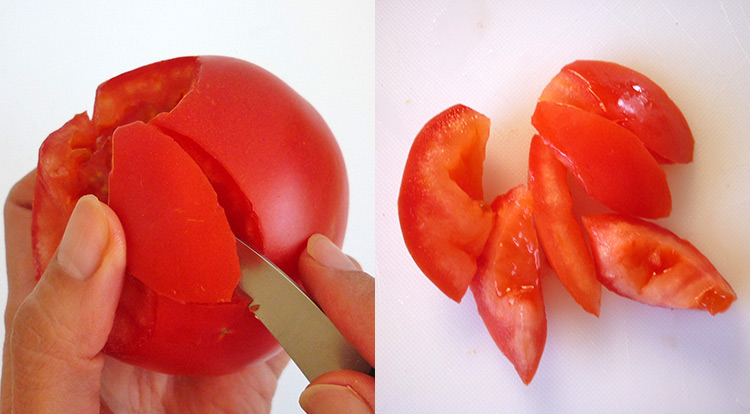
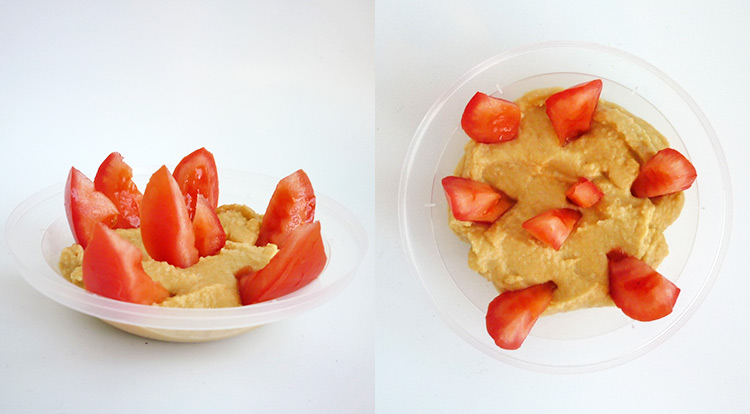
2. Making oval-shaped tomato as the fire
Use a paring knife to carve some oval-shapes on a tomato, make one end of the oval with a sharp point. Also, create them with different variations of size.
3. Place salad dipping sauce in a bowl (optional)
If you have prepared a dipping sauce that will need be served cold or you are having this salad in hot summer. A great idea is you can place the dipping sauce into a small bowl.
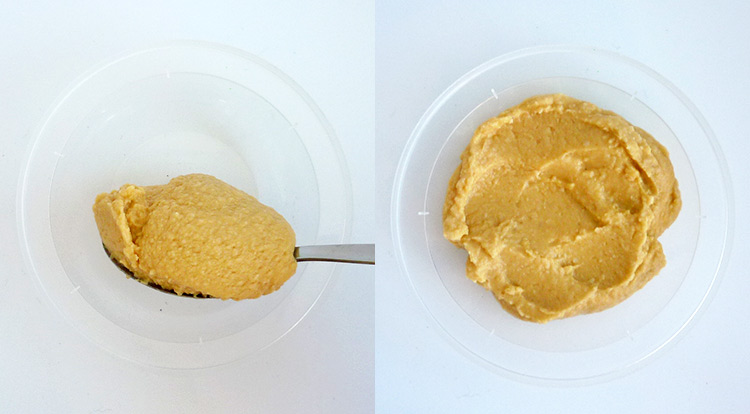
In order to let the oval-shaped tomato that you have just carved to be able to stand up straight in the dipping sauce. Don’t forget to choose some thick dipping sauce to serve with this salad.
4. Put them together (optional)
4-1 Place the bowl of dipping sauce
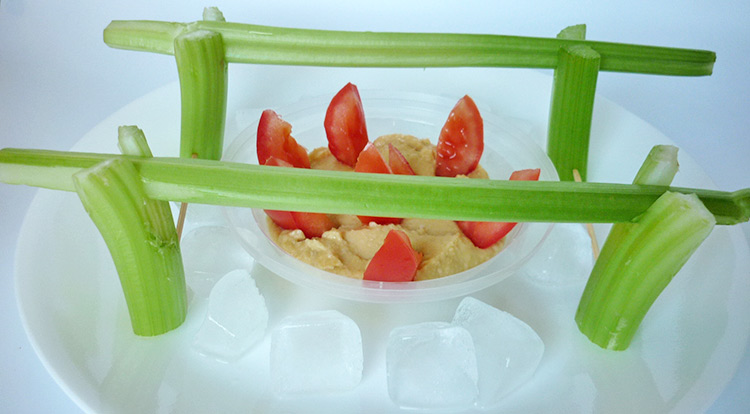
From step 2 and step 3 you have done a firebase with a bowl of dipping sauce and tomato fire, place it under the celery BBQ stand, in the centre of the plate.
4-2 Place the ice around the dipping sauce
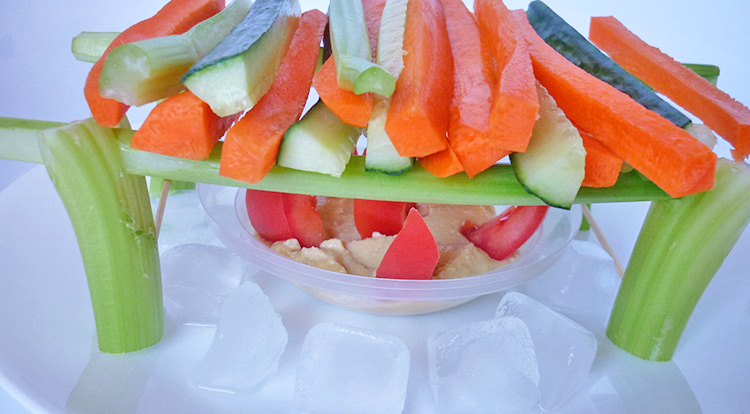
Place some ice around the salad dipping sauce, it is able to help the sauce stay cool. Also, it is able to help the Julienne vegetables remain colder for a little bit too.
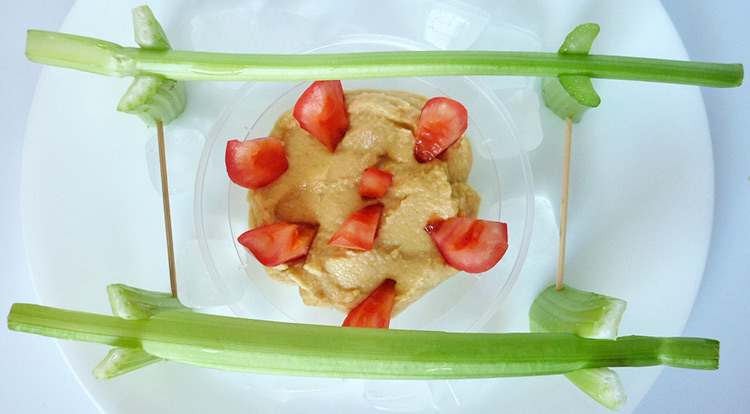
In fact, put the dipping sauce into a small bowl. On the grounds that if the ice is melting and is turning into water, it won’t make the sauce turn soggy. However, be aware that if you are going to put lots of ice on the plate, you will need to use a plate with taller edges to prevent the liquid coming out of your plate when they melt.
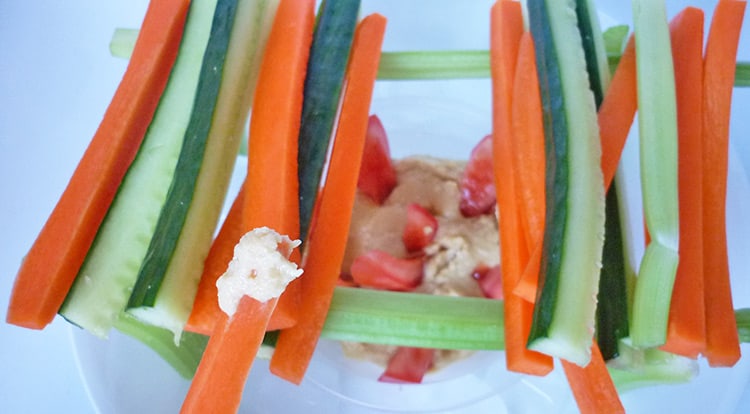
4-3 Place julienne cut vegetables
The best moment is when you place your Julienne cut vegetables on the celery BBQ stand. Try to cut all the vegetables with the same length and thickness. Also, prepare as much different coloured vegetables as you can, it will look fantastic on the celery BBQ stand.
5. Place salad dipping sauce on the plate
If you are not going to serve with ice, you are able to place the salad dipping sauce on the centre of the plate. Place the oval-shaped tomato on the top of the dipping sauce.

If you are concerned the dipping sauce might be hard to see when fully loaded with Julienne vegetables. You are able to create the dipping sauce with a bigger diameter circle under the celery BBQ stand.
In fact, from a different direction, your client is able to see the dipping sauce under the celery BBQ stand. It’s a nice looking food decoration for a party.

Payoff
Another idea for dipping sauce on the bowl is, if you are able to use more small bowls and they are able to fit well under the celery BBQ stand, you can serve different flavours of dipping sauces for this food decoration.
Another good benefit of serving dipping sauce in a bowl is that you are able to replace it with other sauce trays easily. Or if it’s run out, you can just take the bowl out from the plate to change for another one.