Premise
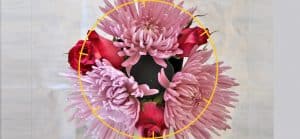
This lesson is an idea to arrange flowers in a love shape. Once you have learned the method, you will be able to create other simple shapes.
YOU WILL NEED
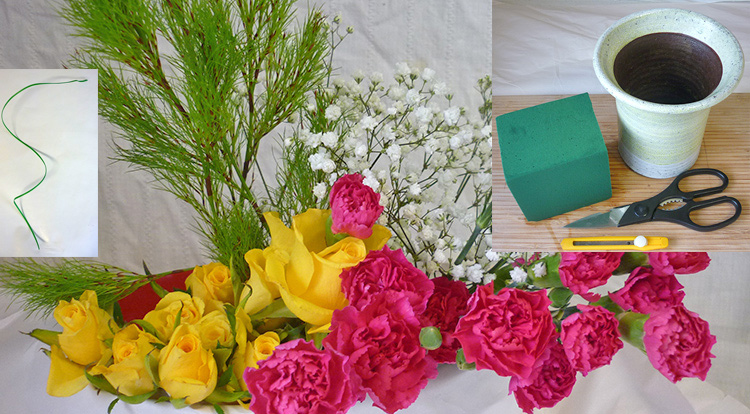
- Scissors
- Utility knife
- A brick of floral foam
- A cylinder vase
- Some garden wire – Green twist tie
- Red pink Carnation x 3 – 4 branches
- Yellow Rose x 10
- Gypsophila x 3 – 4 branches
- Any long stem green plant with fine leaves x 3
Practice
1. Start preparing
1-1 Draw your idea on a piece of paper
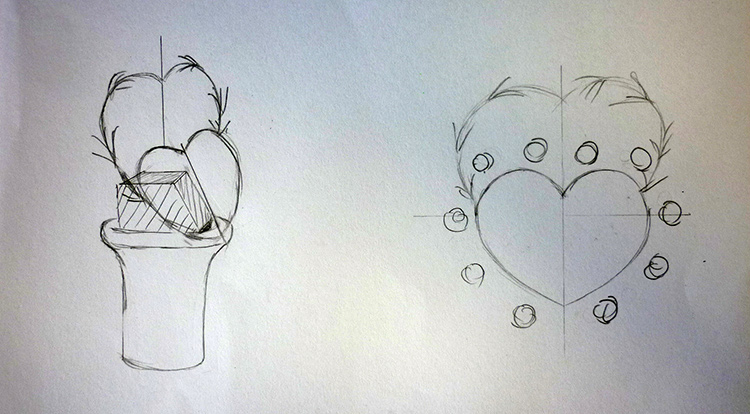
According to the flowers that you have prepared, we start drawing your idea on a piece of paper. For example, we make a main flower face 45 degrees from the top in the center. It depends on how many flowers you have and they are able to form a love shape in a good size. Following, we place 10 small circles around the main love shape for the locations of the roses.
1-2 Prepare the floral foam
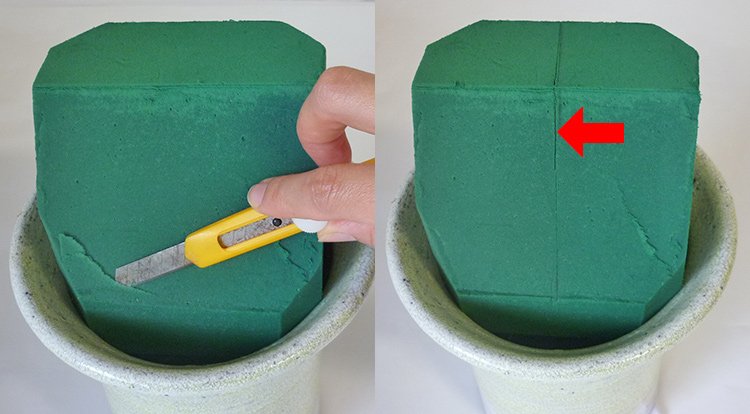
Follow the lesson of Soak floral foam correctly to prepare a right way of floral foam. Also make the size of floral foam is able to fit the cylinder vase which you prepared. After the floral foam soaking well in water, trim its four corners to fit the top circle of the vase.
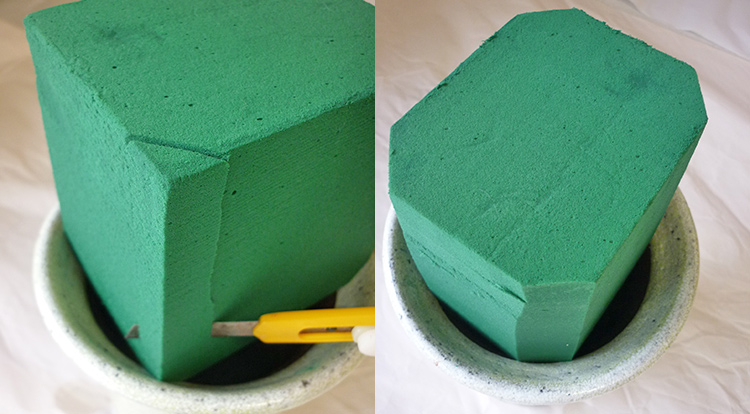
Try to press gently and equally floral foam into the vase. Make sure it’s put in the vase horizontally.
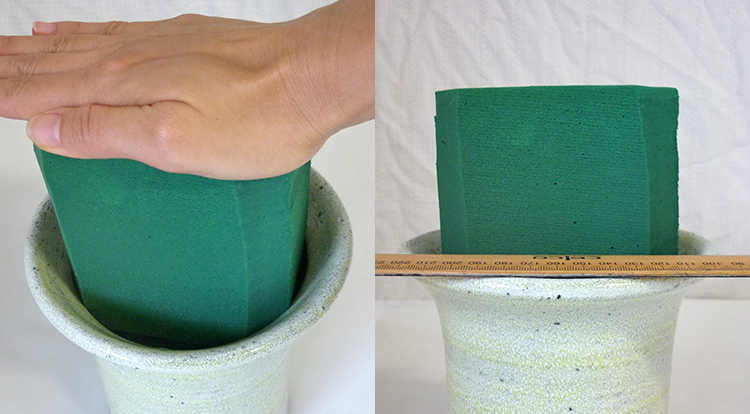
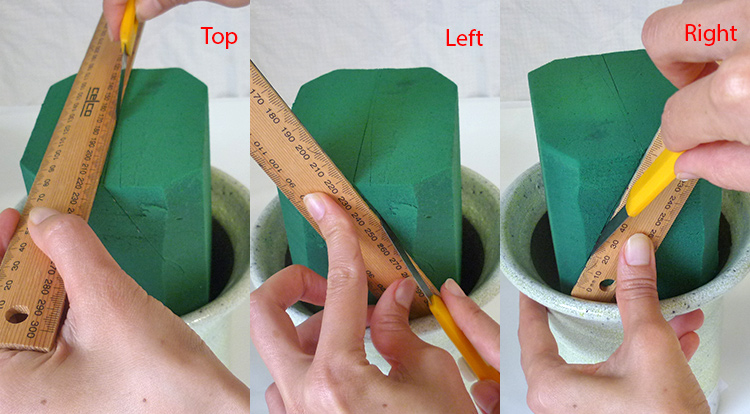
Use the utility knife to draw a line slightly at top on the center of the floral foam, also from the center draw another line 45 degrees down to the front edge of the vase on both sides.
At this point, use a big knife to cut off the area which you just marked. After that, you will have the bevel at front to present the love shape.
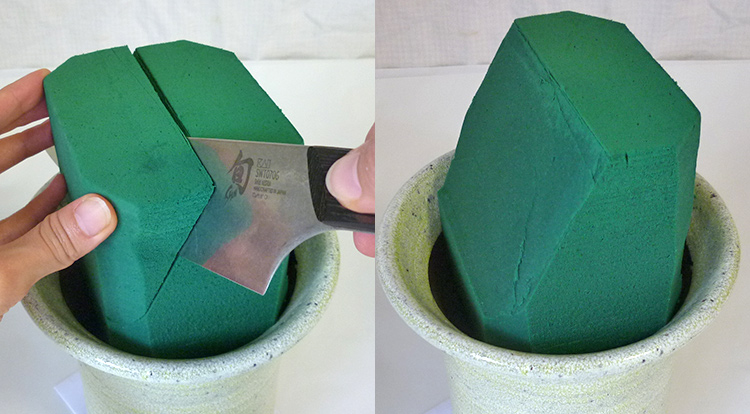
If it needs to trim the surface of bevel smooth. Consequently, use the utility knife to draw a line slightly from the top center continuously to the end of the bevel.
2. Making a love shape
2-1 Create the love shape
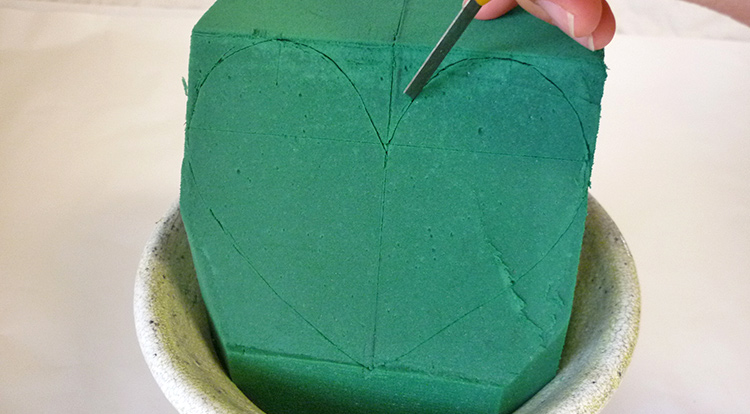
For making a good love shape, we can draw it on the bevel of the floral foam. While you are drawing it, make sure left and right curves are looking equally shaped.
2-2 Prepare flowers
We are going to organize the same height of Carnations on the floral foam, therefore, we can cut all Carnations off from the branches and trim them later.
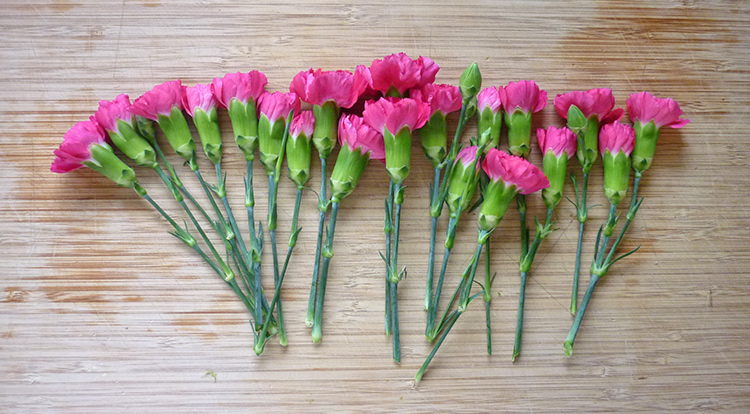
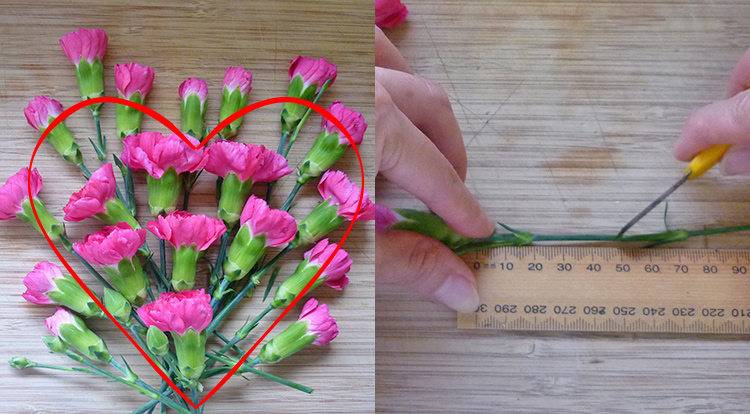
The idea for the arrangement is to make the love shape with opened Carnations at center, and the buds one at top and outside of the love shape. Therefore, we can place the positions of the Carnations on a table to know how big the love shape you are able to create. As such, you take the time to play around and make a good shape. Once the shape has been decided, you are ble to cut each flower stem about 5 – 5.5 cm long.
2-3 Inserting a love shape
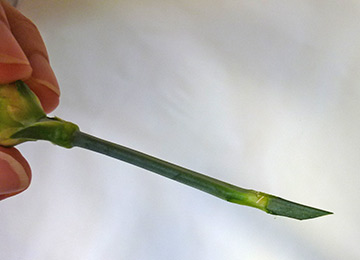
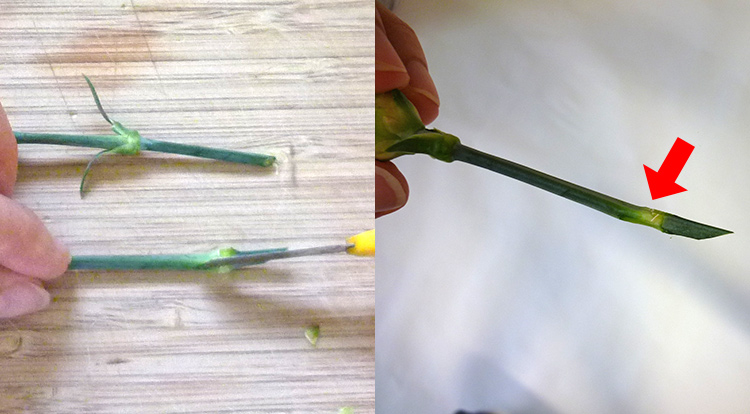
Before you stab a flower into the floral foam, trim the section of the stems with equal thickness. See tips to tell you the reason.
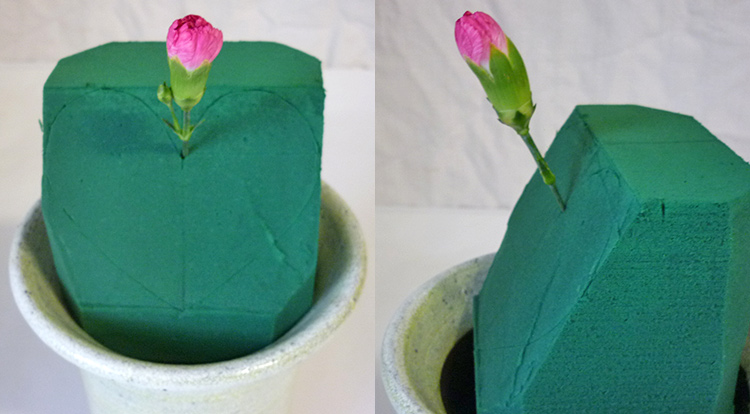
Let’s start with a small bud of Carnation to place at center top of the love shape, let it point 35 – 45 degrees up.
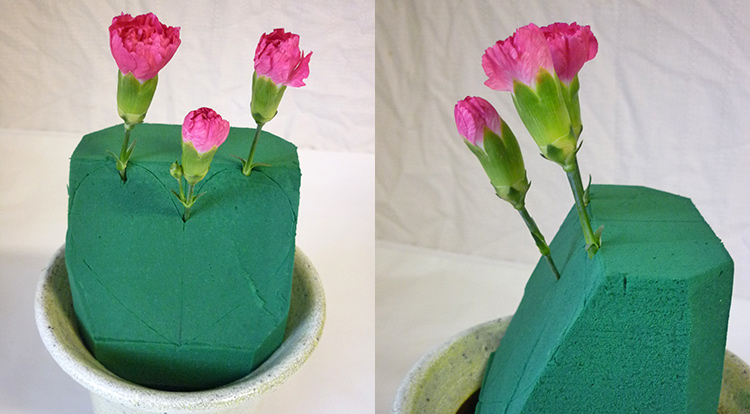
Try to get 2 half opened Carnations to place in the middle curve of the heart top, and let these stems point 35 – 45 degrees.
Next, get 2 opened Carnation to place both on sides of the center point of the heart.
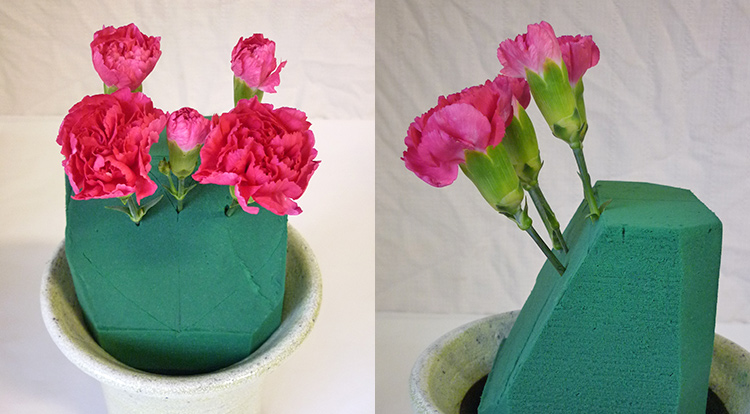
Get 2 half opened Carnations to place at the outside edge of the heart shape.
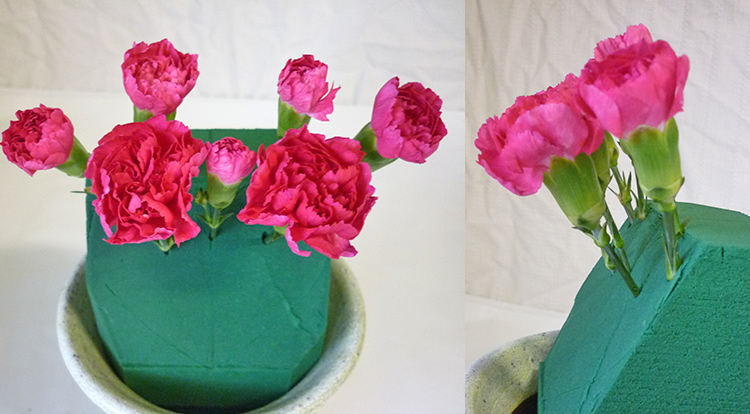
Find 2 opened Carnations to place on the outside heart shape.
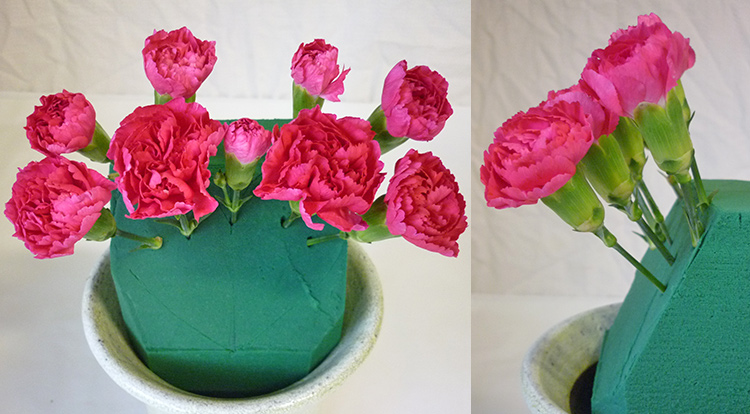
You might have some opened flowers come with bud at side, try to find another similar one to place evenly on the other side of the heart. As such, it should be symmetrical left and right.
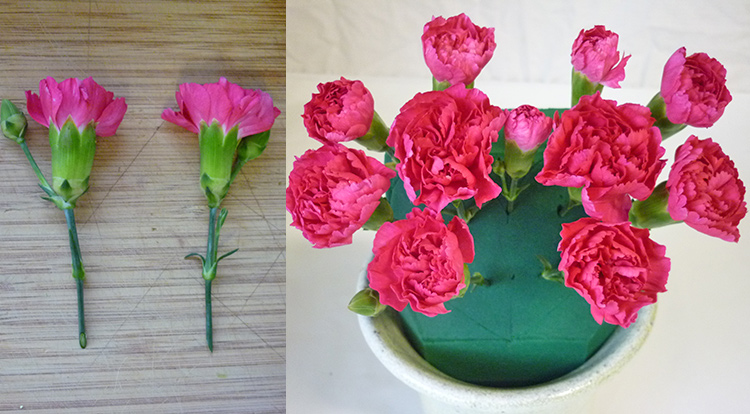
Let’s obtain a bud to place at the end point of heart.
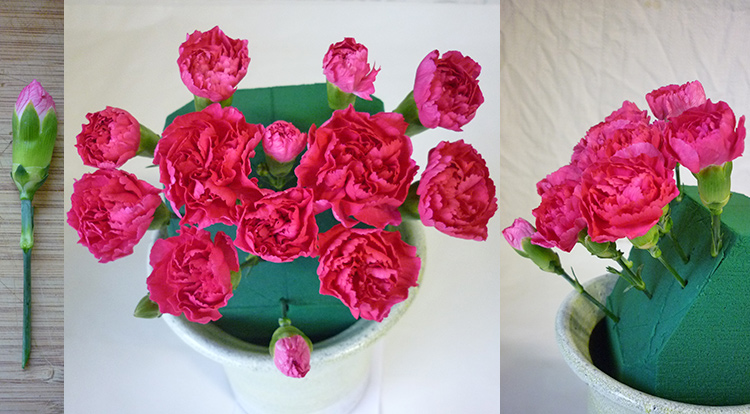
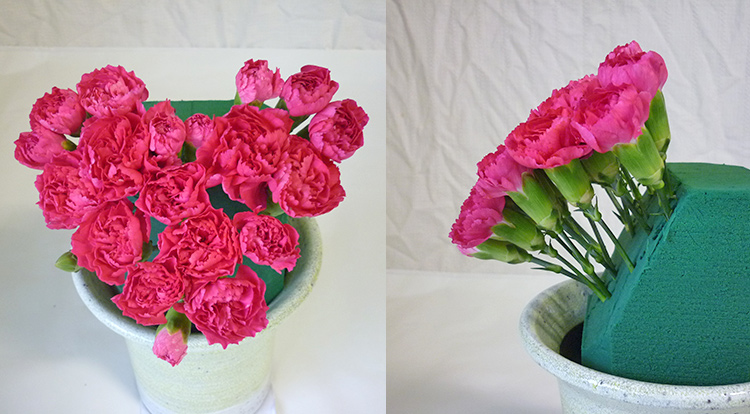
All most there, check how many flowers you have left, place them at right spots to form the heart shape. In principle, the locations is judged by opened size of flower. Small one place it outside, big one stay in the inside of heart shape.
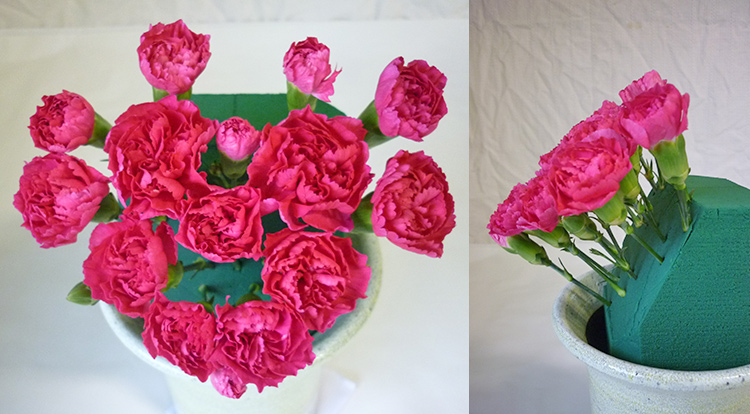
Ultimately, try to keep those flowers as close together as you can. Also to make a good heart shape from the front view and arrange the surface of the heart shape slightly curved on the side view.
3. Secondary flowers
3-1 Prepare flowers
All right, let’s get 10 roses ready. Also trim all leave off first.
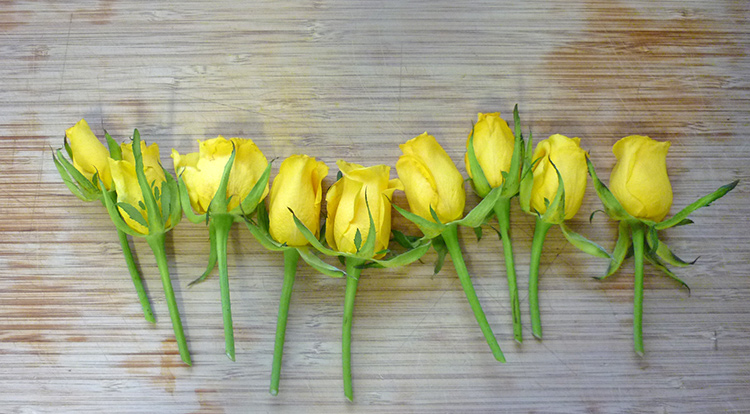
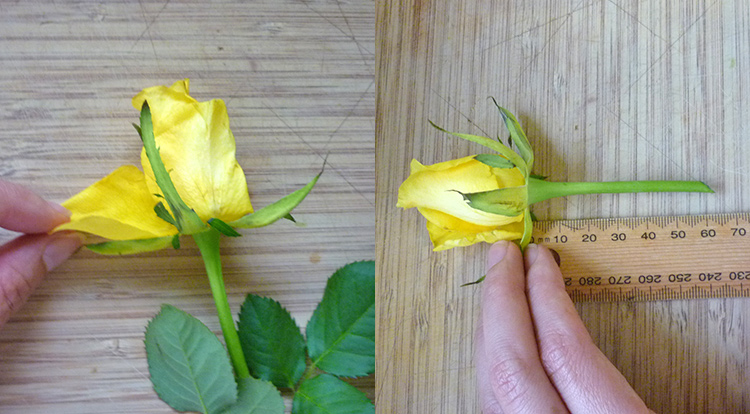
If some rose petals look brown, you can take them off. Just keep the bud a nice shape. After that, we are able to cut each stem about 6 – 6.5 cm long.
3-2 Inserting flowers around the love shape
Place a rose at the bottom of the heart shape about 0.5 cm taller than the heart shape on the side view, also let it direct a little bit outward.
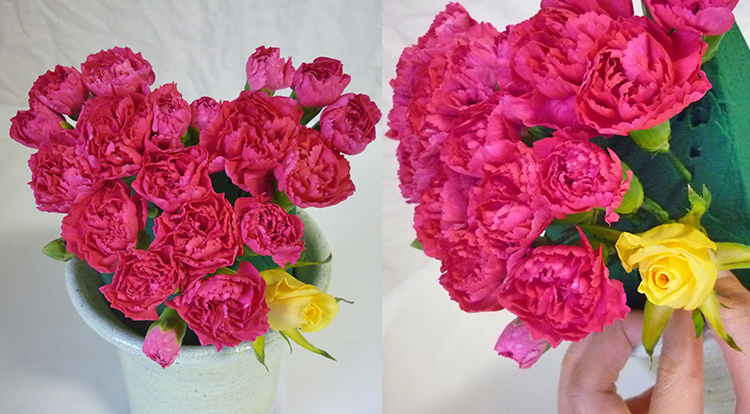
The following, get 2 bigger buds of rose to place at the top curves of the heart, make it about 1 cm taller than the heart on the side view, also direct a little bit outward. Do the same way for presenting symmetrical left and right
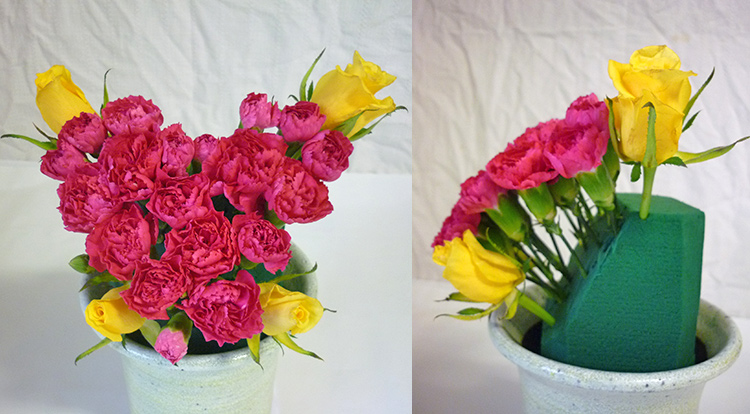
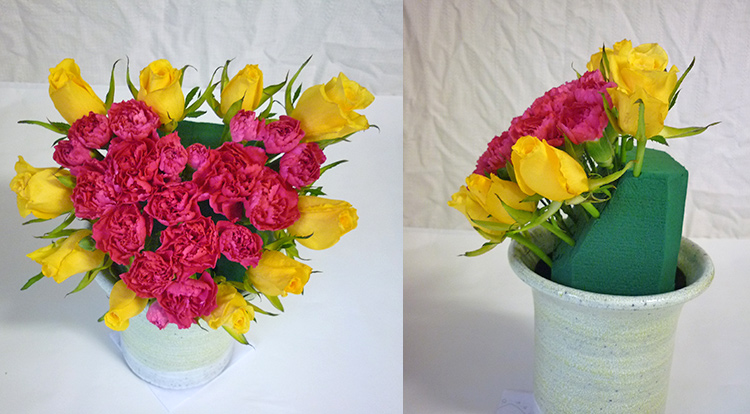
Next, distribute equally rest of 8 roses around heart. In principle, top is taller from 1 cm gradually to reduce down 0.5 cm taller than heart on the side view. Also notice the direction is a little bit outward and symmetric both sides.
4. Create another love shape at background
4-1 Prepare the background plants
Find 2 similar shaped and length green stems from source material “I”.
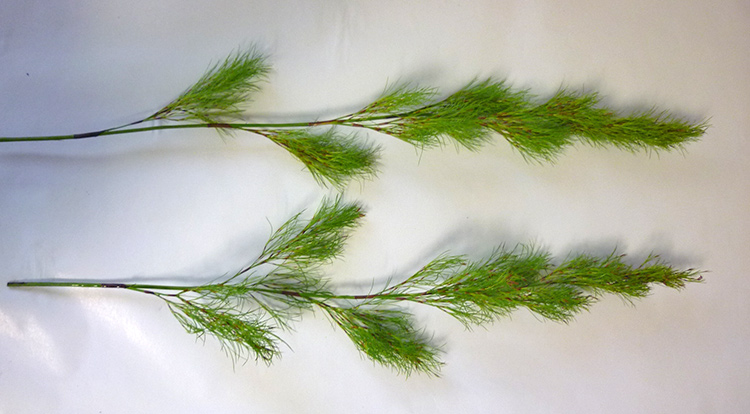
Place these 2 green stems at the heart shape at very end of both top sides.
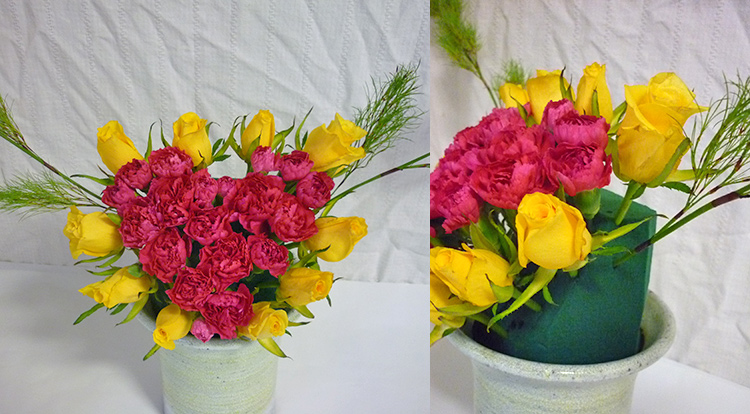
4-2 The key skill to learn
We are going to make another love shape at background. Tie top end of green plant together with garden wire. Then find a thick section of Carnation stem.
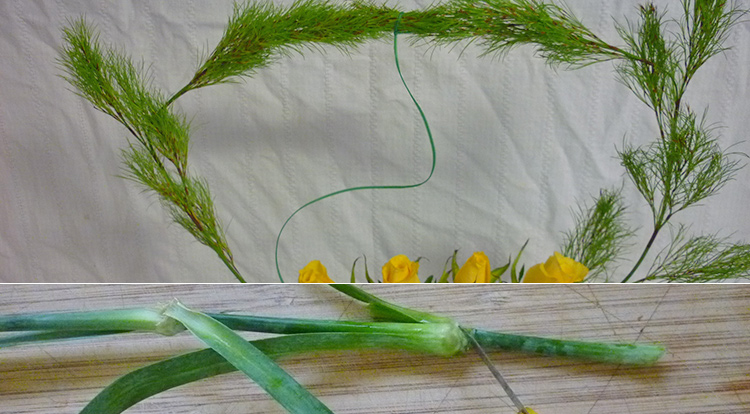
From step 27, tie both top of long green plants with garden wire, keep using it to tie the section of Carnation stem. After that, pull it down and stab into the center back top of the floral foam.
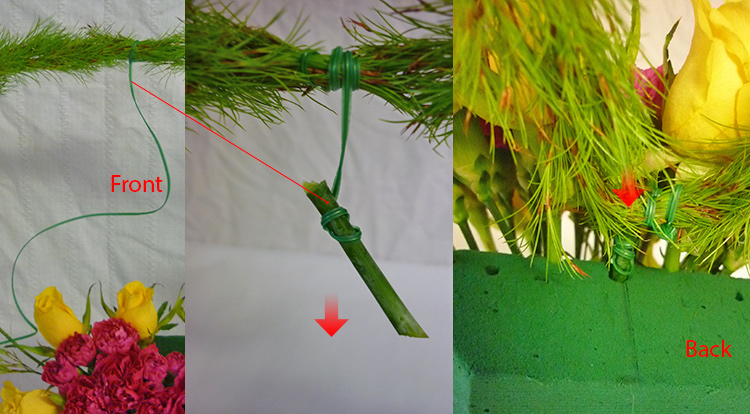
4-3 Arrange the curve of shapes
At this point, we have the green plants forming another heart shape in the background. However, it doesn’t look good, as the plants stems are too soft.
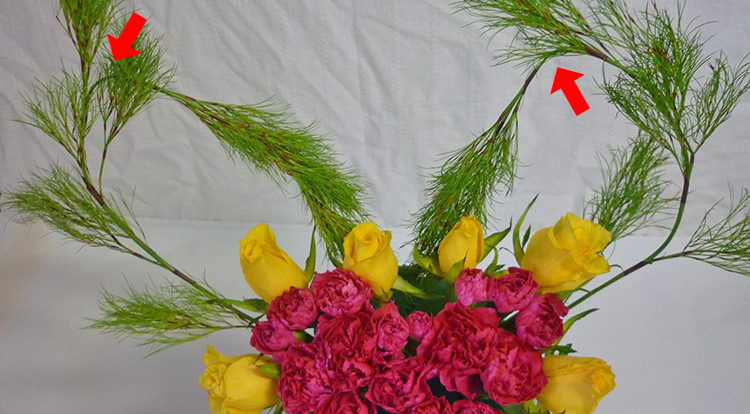
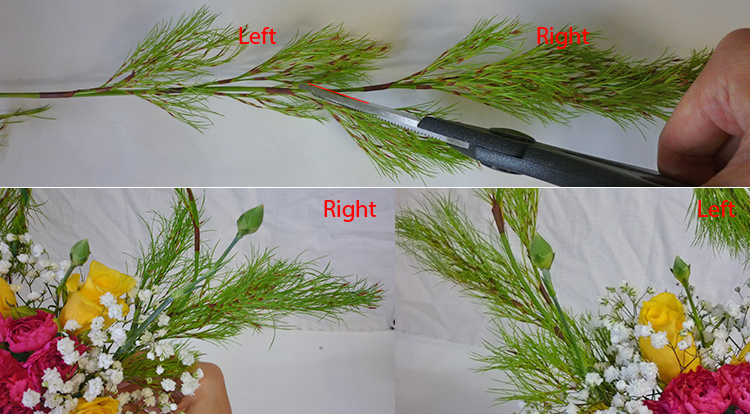
The solution is to get another 2 garden wires to tie the stems of the green plant with some leaves together to make it stronger.
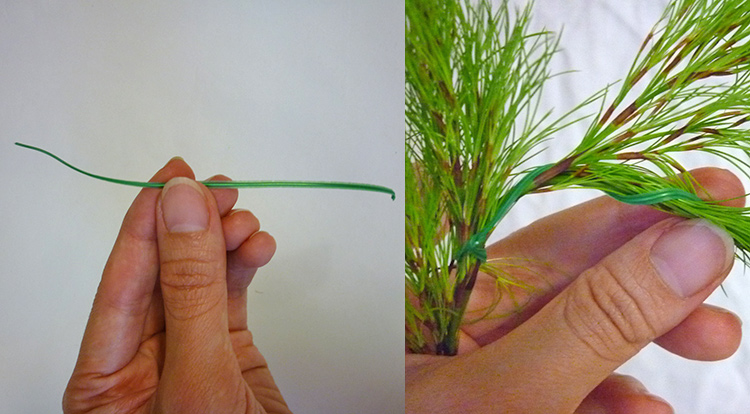
As such, we are able to build a good heart shape in the background.
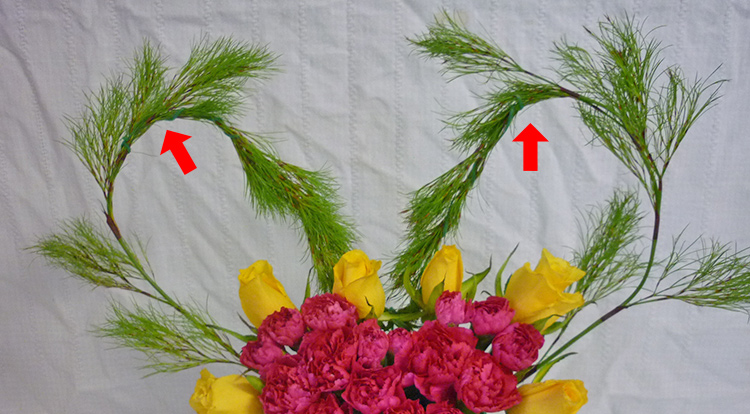
5. Make the background more interesting
When we are arranging flowers, we should not wast any of them. Try to design some interesting way to use all of them into your art work. As such, take the rest of Carnation stems back that you trimmed off before. You should be able to find some little green buds, and keep as much of the long stem on. Just keep the section clean and straight without any branches.
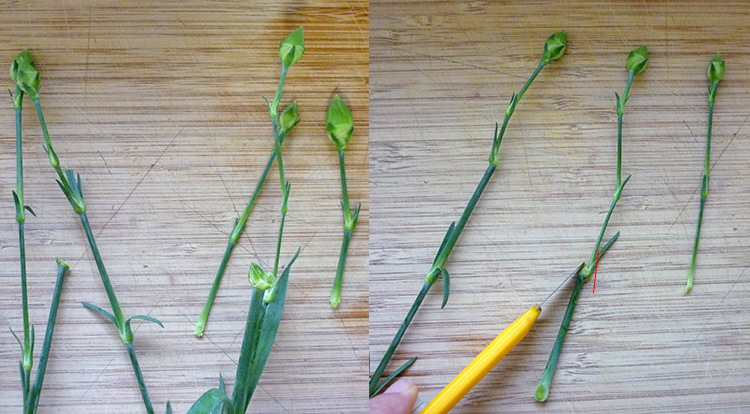
After that, place these little green buds at the back of half top of the heart shape around.
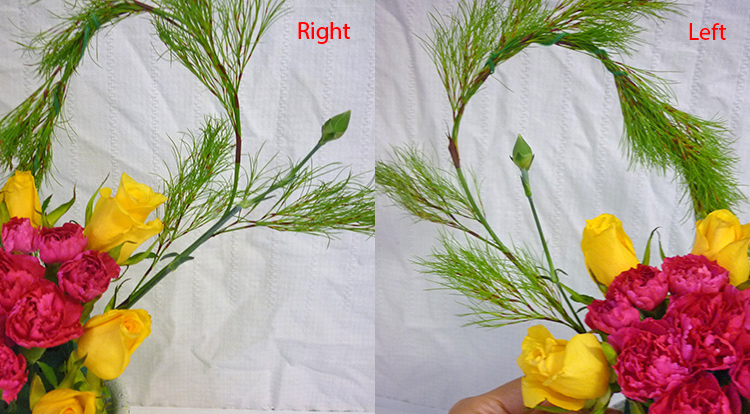
At this point, the heart shape is extending out and looking more interesting.
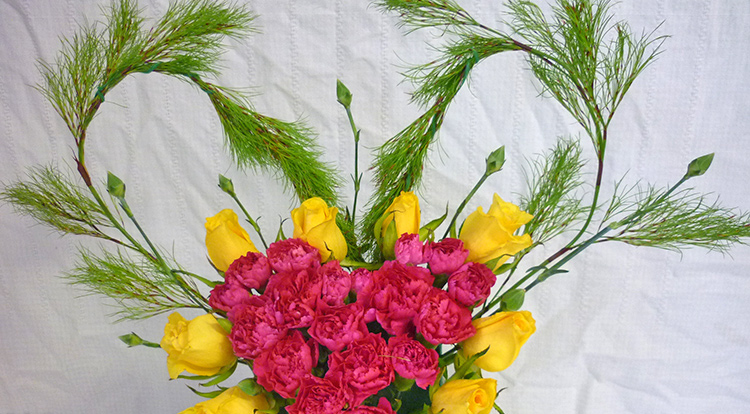
6. Fill in the gaps
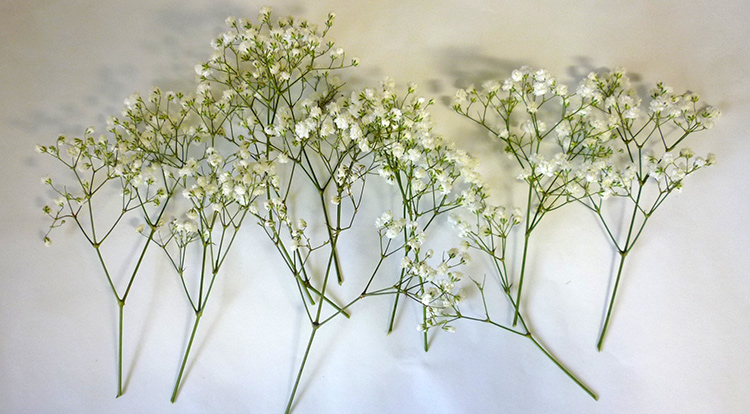
Consequently, trim the Gypsophila about 5 – 6 cm long for arranging.
Stab the Gypsophila around yellow rose, but not higher than Carnation.
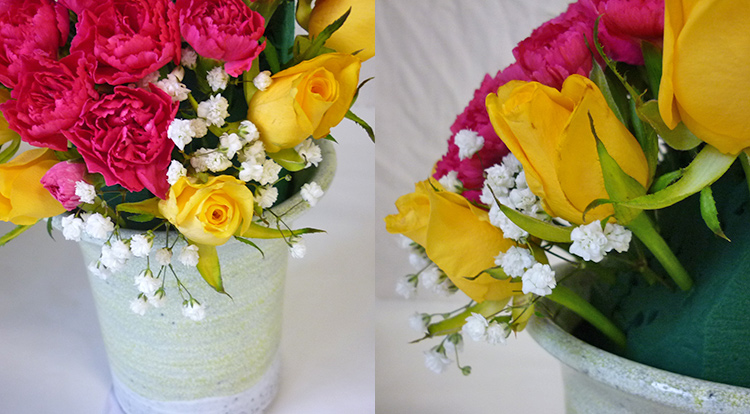
The Gypsophila is designed for decorating the space between the Carnation around to yellow rose.
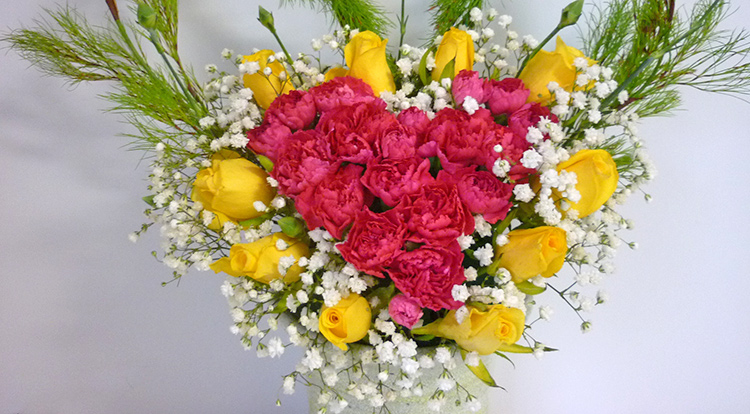
If you have more green stem plants, you can trim them short, and place around the very end of both sides of the heart shape in the background which are the spots that stabbed the green stem plants.
Payoff
At this point, check left and right side, and see are there parts that you would like to adjust it. If you can fix some big gaps between flowers and improve it, that is good to do at this moment.
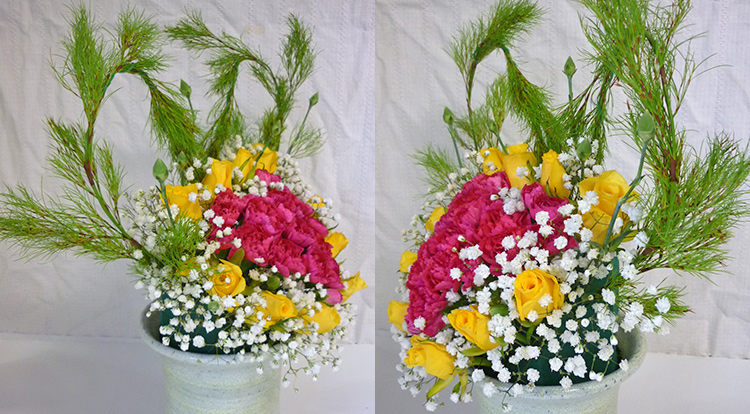
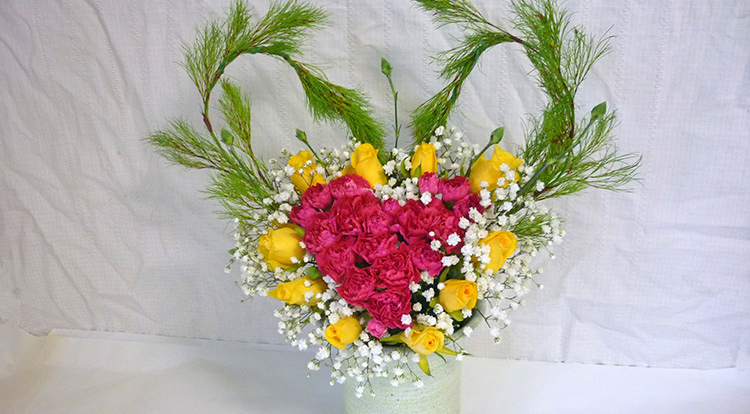
Great, we have done it.
Tips
Why should you trim the sections of stems with equal thickness? The answer is that the same thickness of stem that you stab into the floral foam will make the stem stay stable on it. If it's not trimmed, you will make a bigger hole in the floral foam, also it will make the other flower stems to be loose.
